
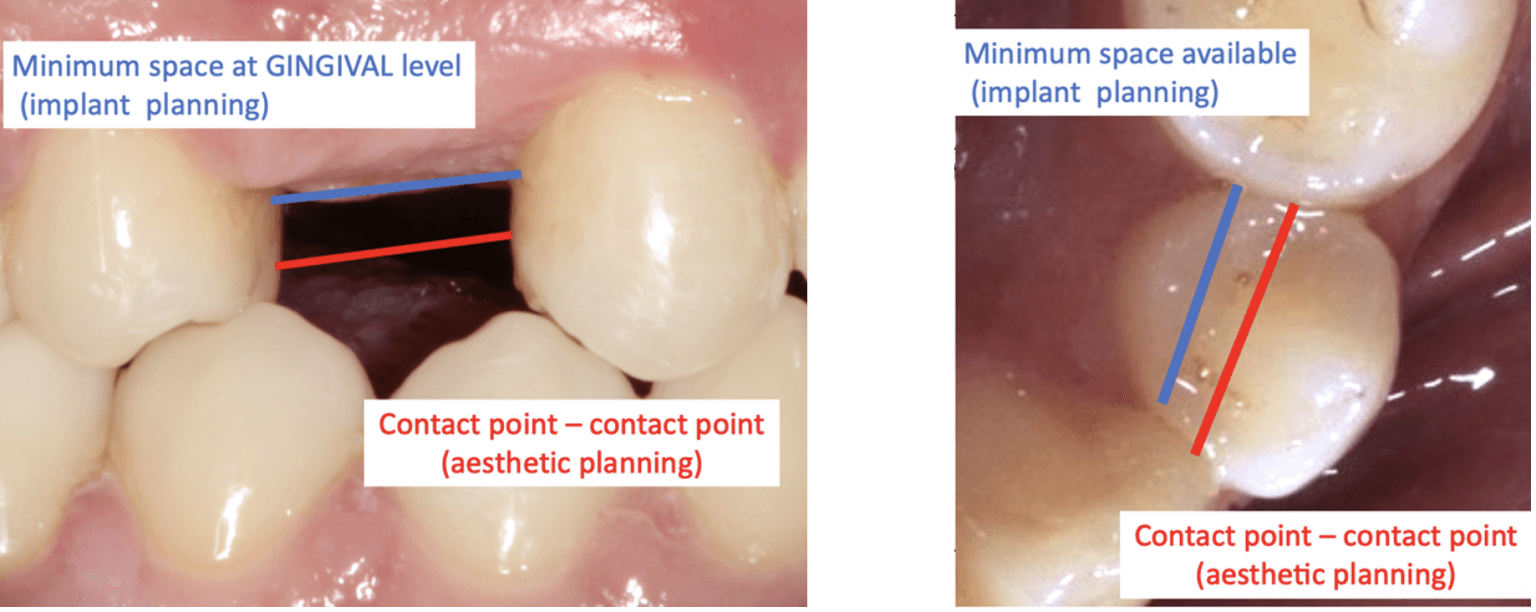
Space Measurement at a Root Level
Dental implants require a minimum of 5.5mm of space. This minimum is determined by the smallest dental implant diameter of 2.9mm, a minimum of 1.0mm of space required between the implant and the adjacent tooth to allow stable osseointegration, and the additional factor of 11% root relapse following orthodontics, which increases the total minimum space requirement to 5.5mm.
We're all familiar with the case. A patient presents with a gap and wants it closed, a crown, bridge or implant, but the space just isn't enough. The gap is too narrow for a properly proportioned tooth.
Sometimes, the neighbouring teeth have drifted and tipped. In other cases, the opposing tooth has over-erupted and taken up the occlusal space we need.
You can still make something fit, but “fit” isn't the same as “beautiful”. You end up with a lateral that looks like a central's little brother, a pre-molar crown as thin as a wafer, or an implant squeezed in so tightly there's no room for healthy gum between it and the next tooth.
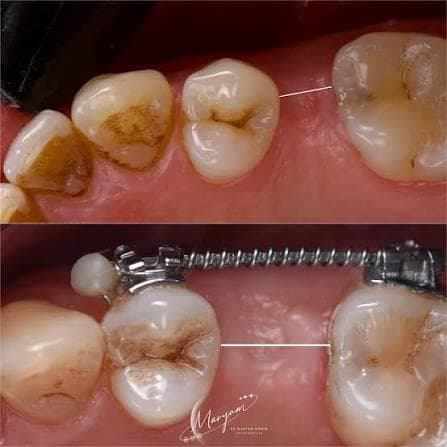
After more than 40 years at the bench, I can tell you this: the best restorations start with the right space. These days, creating that space is often easier, quicker and less invasive than people think.
Ortho First, Resto Second
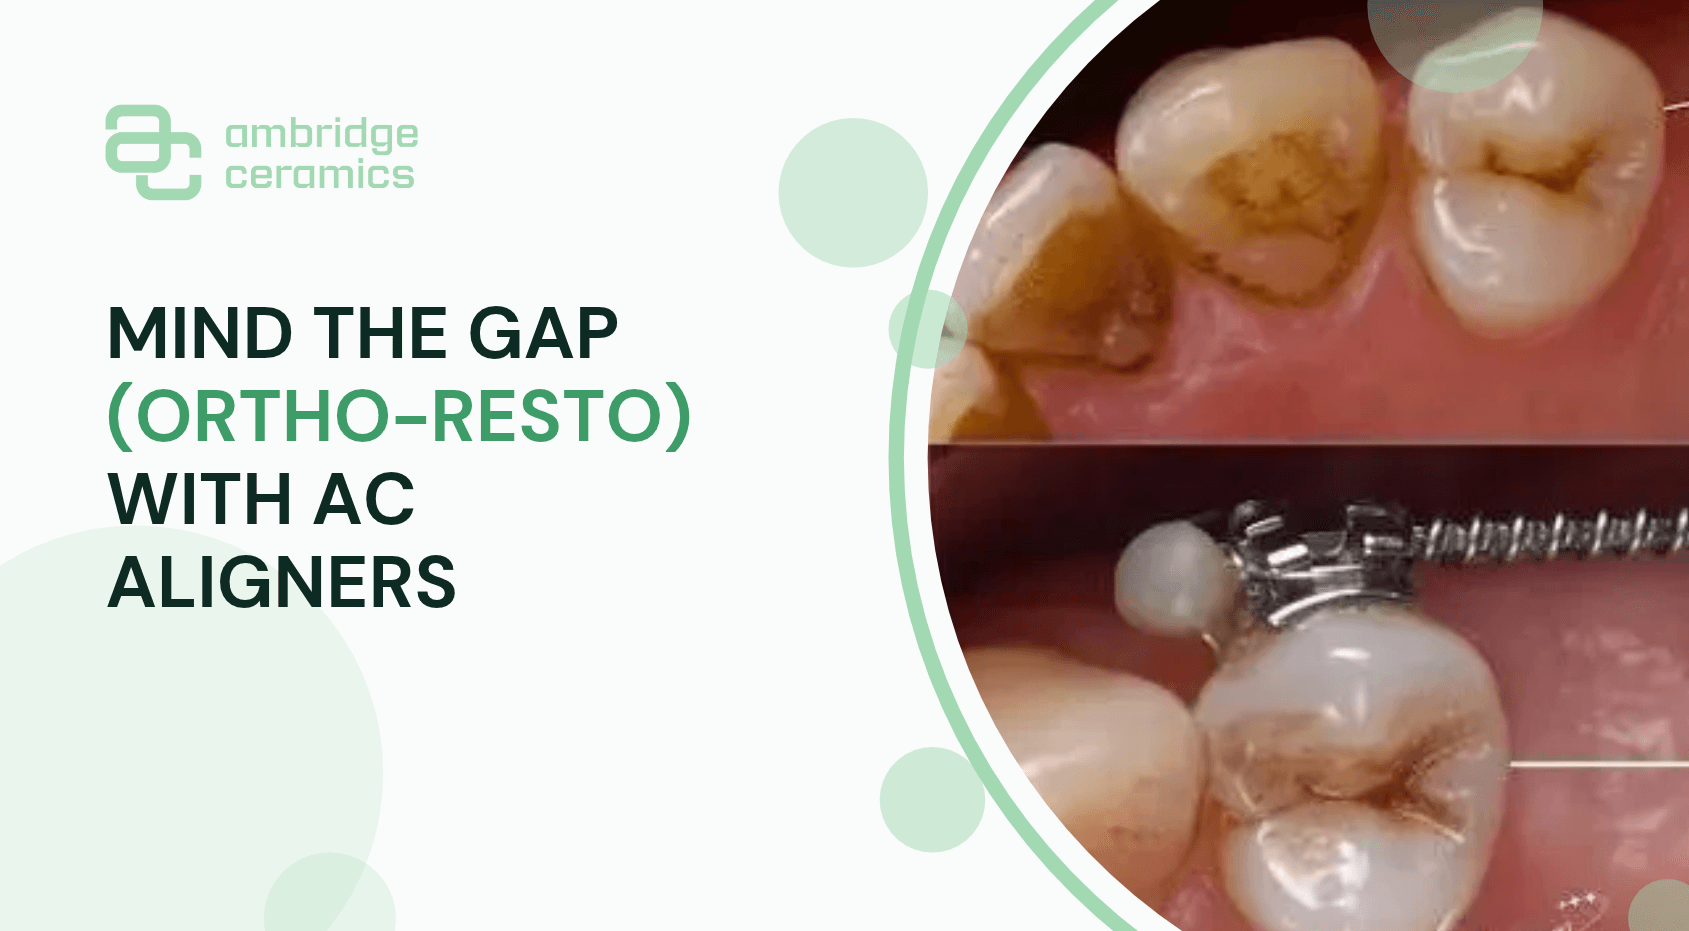
“Ortho-resto” simply means using a short course of orthodontics to move the teeth into the best position before restoring them. It isn't full-blown orthodontic treatment, and the aim isn't a Hollywood smile. It's a targeted few millimetres of movement so that the restoration can be the right size, the right shape and in the right place.
With clear aligners, many of these cases now need only 3 to 6 months. The patient barely notices them, while the dentist ends up with a far better foundation to work on.
Where Aligners Earn Their Keep
Making Room for an Implant
An implant needs space, not just at the crown but between the roots.
As a general guide, you want 1–1.5mm of bone between an implant and the natural root next to it, and around 3mm between two implants. When neighbouring teeth have tipped into the gap, their roots can block the way even when the crowns look far enough apart.
Aligners can upright those teeth and open the space. The surgeon then has room to work, and the gum has room to do its job. This brings us to the Tarnow principle.
The 5mm Rule: Why the Gum Cares About Space Too
Every dentist knows the dreaded “black triangle”, that dark gap between two teeth where the gum, or papilla, should be. Once it's there, it's very hard to hide, however good the crown is.
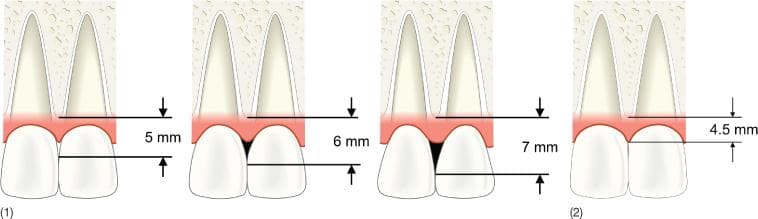
In 1992, Dr Dennis Tarnow and his colleagues demonstrated something every restorative team should keep in mind. If the contact point between two teeth is 5mm or less above the crest of the bone, the papilla fills the space almost every time. At 6mm, it fills only about half the time. At 7mm, barely a quarter.
That is the Tarnow principle, and it tells us two things.
First, the contact point has to be in the right place. We can only achieve that if the space allows a properly shaped tooth. A natural-looking crown has its contact where nature would put it, close enough to the bone for the papilla to fill in.
Second, forcing a tooth into a gap that's too small works against you. When the space is too narrow, we're forced to make the crown long and thin or taper it at the neck to fit. This pushes the contact point upwards, away from the bone, leaving the papilla without the support it needs.
Squeeze an implant into a restricted space, and the bone between the implant and its neighbour can be lost altogether. Lose the bone and you lose the papilla, usually for good.
A cramped space doesn't just result in an unnatural-looking tooth. It can cost the patient their gum as well.
Opening the space with aligners first allows us to design a tooth with natural proportions, position the contact point correctly and maintain healthy bone either side. The papilla then has everything it needs to fill the gap.
From the Bench
“Give me the right space and I'll give you the right tooth. Squeeze me into the wrong space and the best I can do is the least-worst tooth.”
Every technician knows the feeling of opening a case and realising that the available space has already influenced the outcome before we've even started. Proportion, emergence profile, embrasures and gum health all depend on it.
A few months of planning at the beginning can save a lifetime of compromise at the end.
Plan the Finish Before You Start
The real secret of Ortho-Resto is reverse planning. Decide what the final restoration should look like first, then work out where the teeth need to be to make it happen.
That's where we come in. With a digital diagnostic wax-up, we can show you and your patient the intended finished result before a single tooth moves. We can then plan the aligner movements to create exactly the space that design needs, no more and no less.
Your patient sees where they're heading, you know exactly what you're aiming for, and we know precisely what we'll be making at the end.
Everybody is working from the same blueprint.
A Few Practical Pointers
Keep the gap looking good while it opens.
A pontic tooth can be built into the aligner itself, so the patient doesn't have to walk around with a hole in their smile during treatment.
Let it settle.
Teeth that have just moved will try to go back. Allow a short period of retention before taking the final impressions or scans. This helps ensure that the space you've worked to create is still there when the restoration is fitted.
Retain afterwards.
Once the restoration is fitted, a retainer helps protect the result. It's all too easy to skip this step and regret it later.
Talk to us early.
The sooner we see the case, the better we can plan it. A quick scan and a conversation at the beginning can save a lot of head-scratching at the end.
AC Aligners: One Team, Start to Finish
AC Aligners brings the orthodontic and restorative sides of a case together under one roof. Your aligner set-up and final restoration are planned together from day one by people who understand both.
You don't have to coordinate two different suppliers, and you're not left hoping that the space created will suit the tooth that's going into it.
Whether it's a single implant site, a pair of lateral veneers or a full smile makeover, we'd be delighted to help you plan it.
Call the lab on 01765 607347 or send us your scans through your usual scanner portal, and let's talk about your next ortho-resto case.
Ready to Work With Ambridge Ceramics?
Talk to our dental laboratory team about your restoration requirements and laboratory workflow. Experience consistent quality, digital precision, and technician-led technical support for your implant cases.
Continue Reading
Labline Whitening Trays: Who Makes Them? We Do !
More than 30 years ago, when teeth whitening and custom tray whitening was only just finding its way into UK practices, we along with Optident Dental Solutions set up Labline, the first dental laboratory in Britain dedicated solely to making Bleaching trays or Whitening trays as they became known.

MHRA, GDC and DAMAS: What Your Dental Lab Should Be Able to Show You
When you choose a dental lab, the restoration in your hand is only half the story. The other half is the paperwork behind it: who made it, to what standard, and whether the lab is properly registered to make it at all.
How to Choose an Implant Dental Laboratory in the UK
Not sure how to pick a dental laboratory for implant cases? Explore key factors UK dentists should consider, from accuracy to aftercare and pricing.