
A Bond That Lasts: The Overlooked Science of Cementation
Why Your Crown Changed Colour — And It Wasn't the Lab's Fault!
A restoration can leave our laboratory the perfect shade, verified against the shade tab, checked under multiple light sources, signed off by the technician who built it and QC, and still come back from the surgery on images, looking wrong.
Nine times out of ten, the shade wasn't lost in the lab. It was lost at the chairside, often in a single, well-intentioned but mistaken choice of cement.
As dentistry moves further into translucent, light-transmissive materials like Fusion Zirconia, E.max and other lithium disilicates, feldspathic porcelains, hybrid ceramics, the margin for error at cementation has shrunk considerably. The more translucent the material, the more it behaves like a window rather than a wall. Through a window, you see whatever's behind the glass — including what's happened to the bonding surface in the interim.
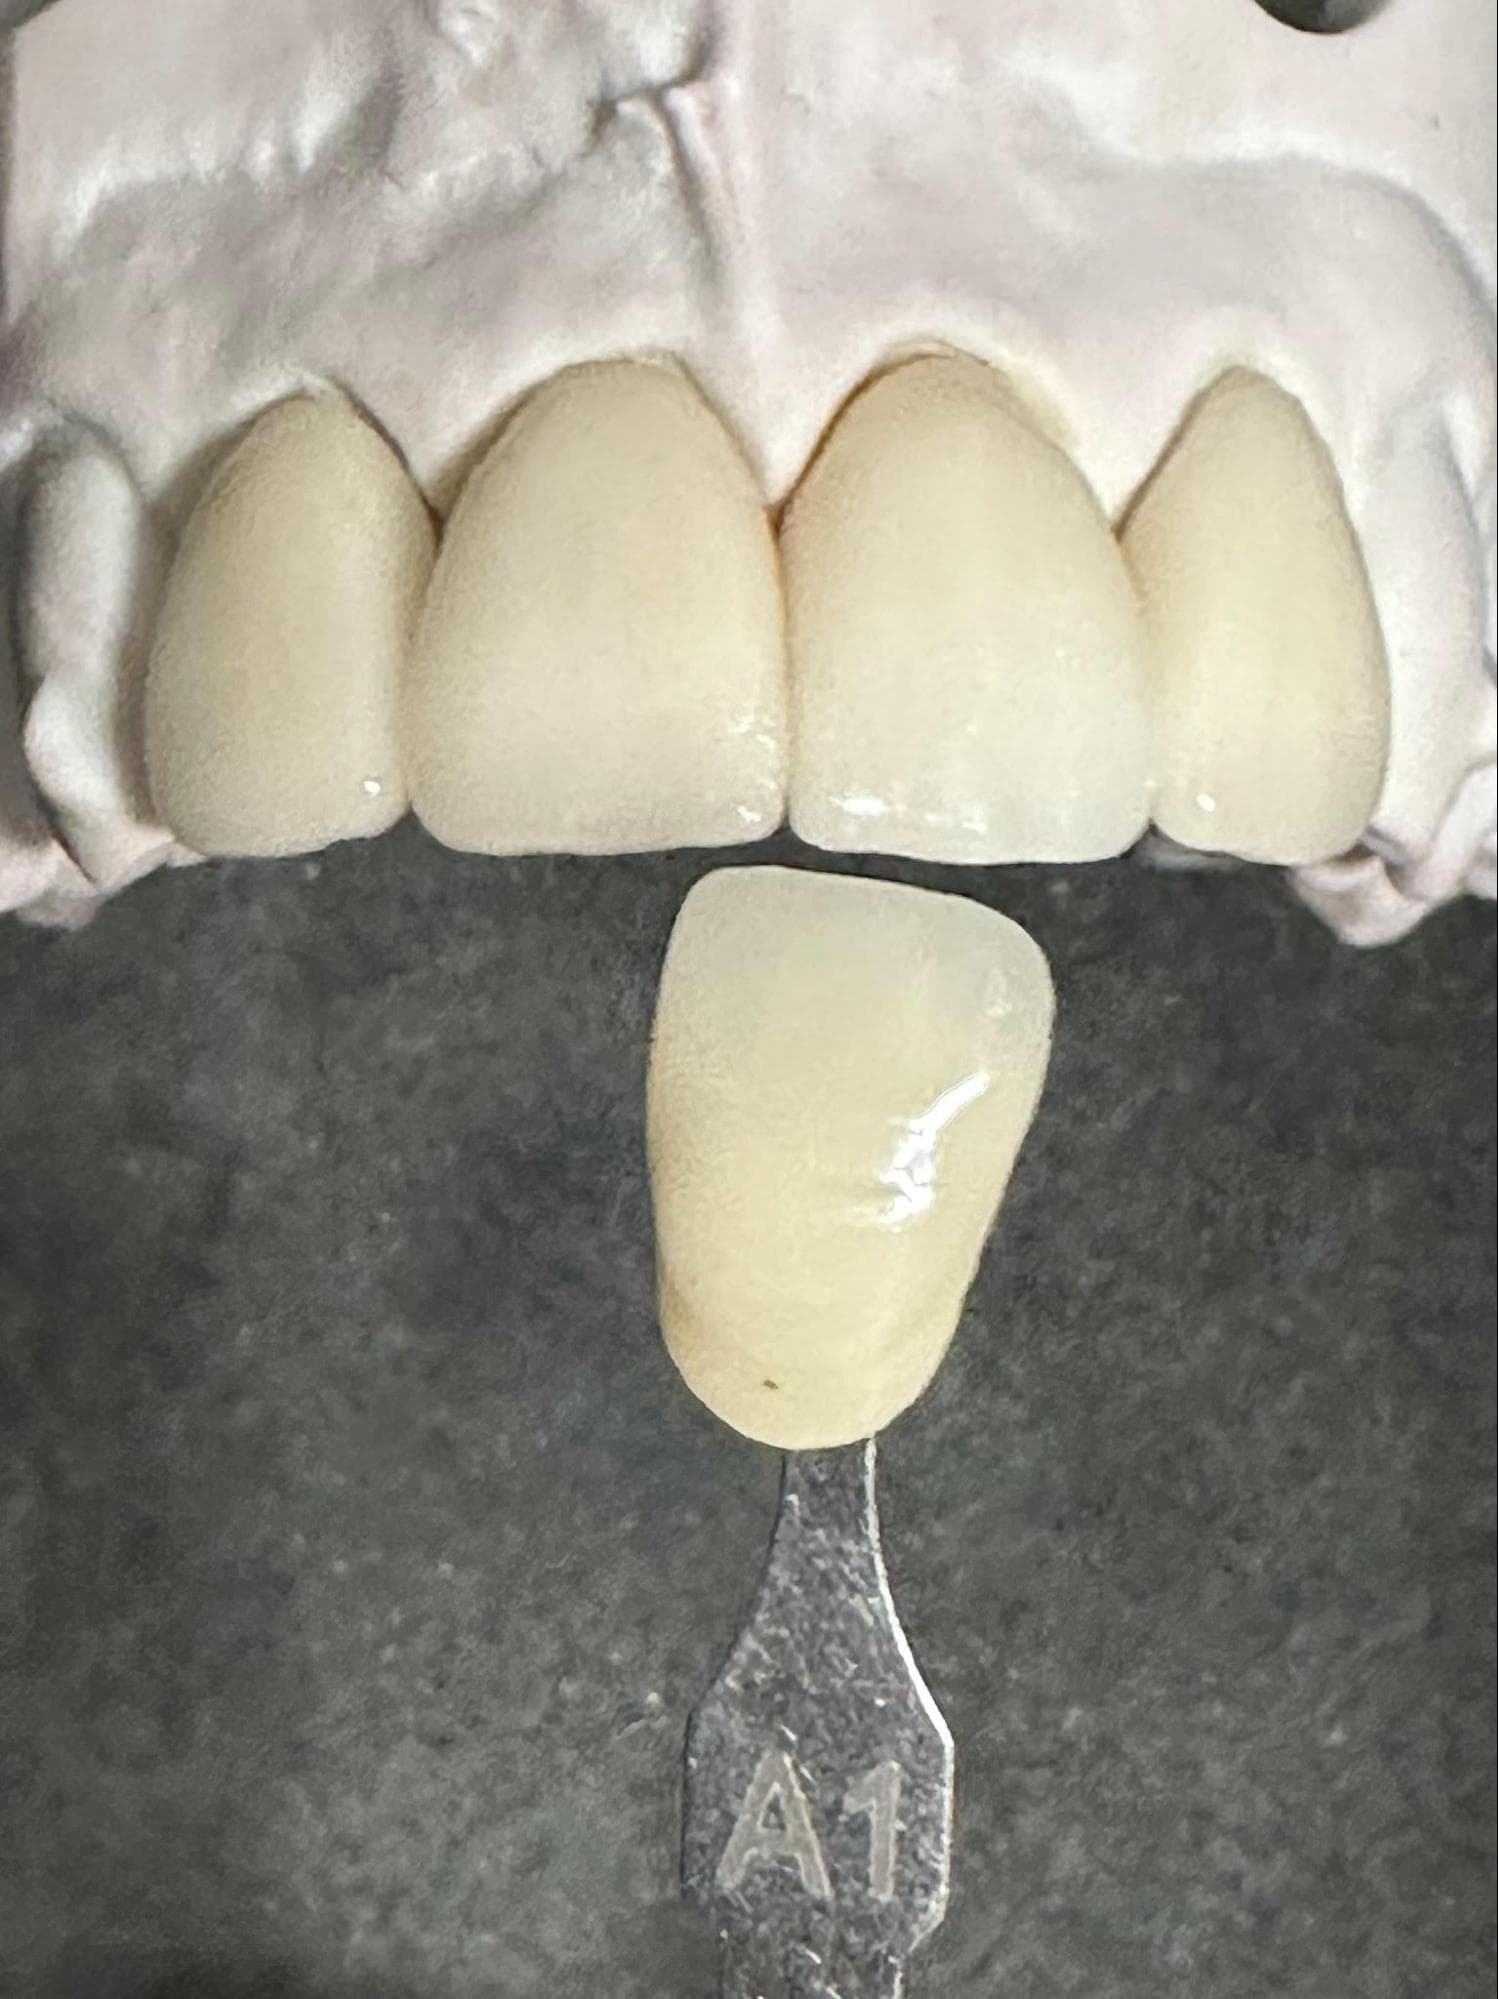
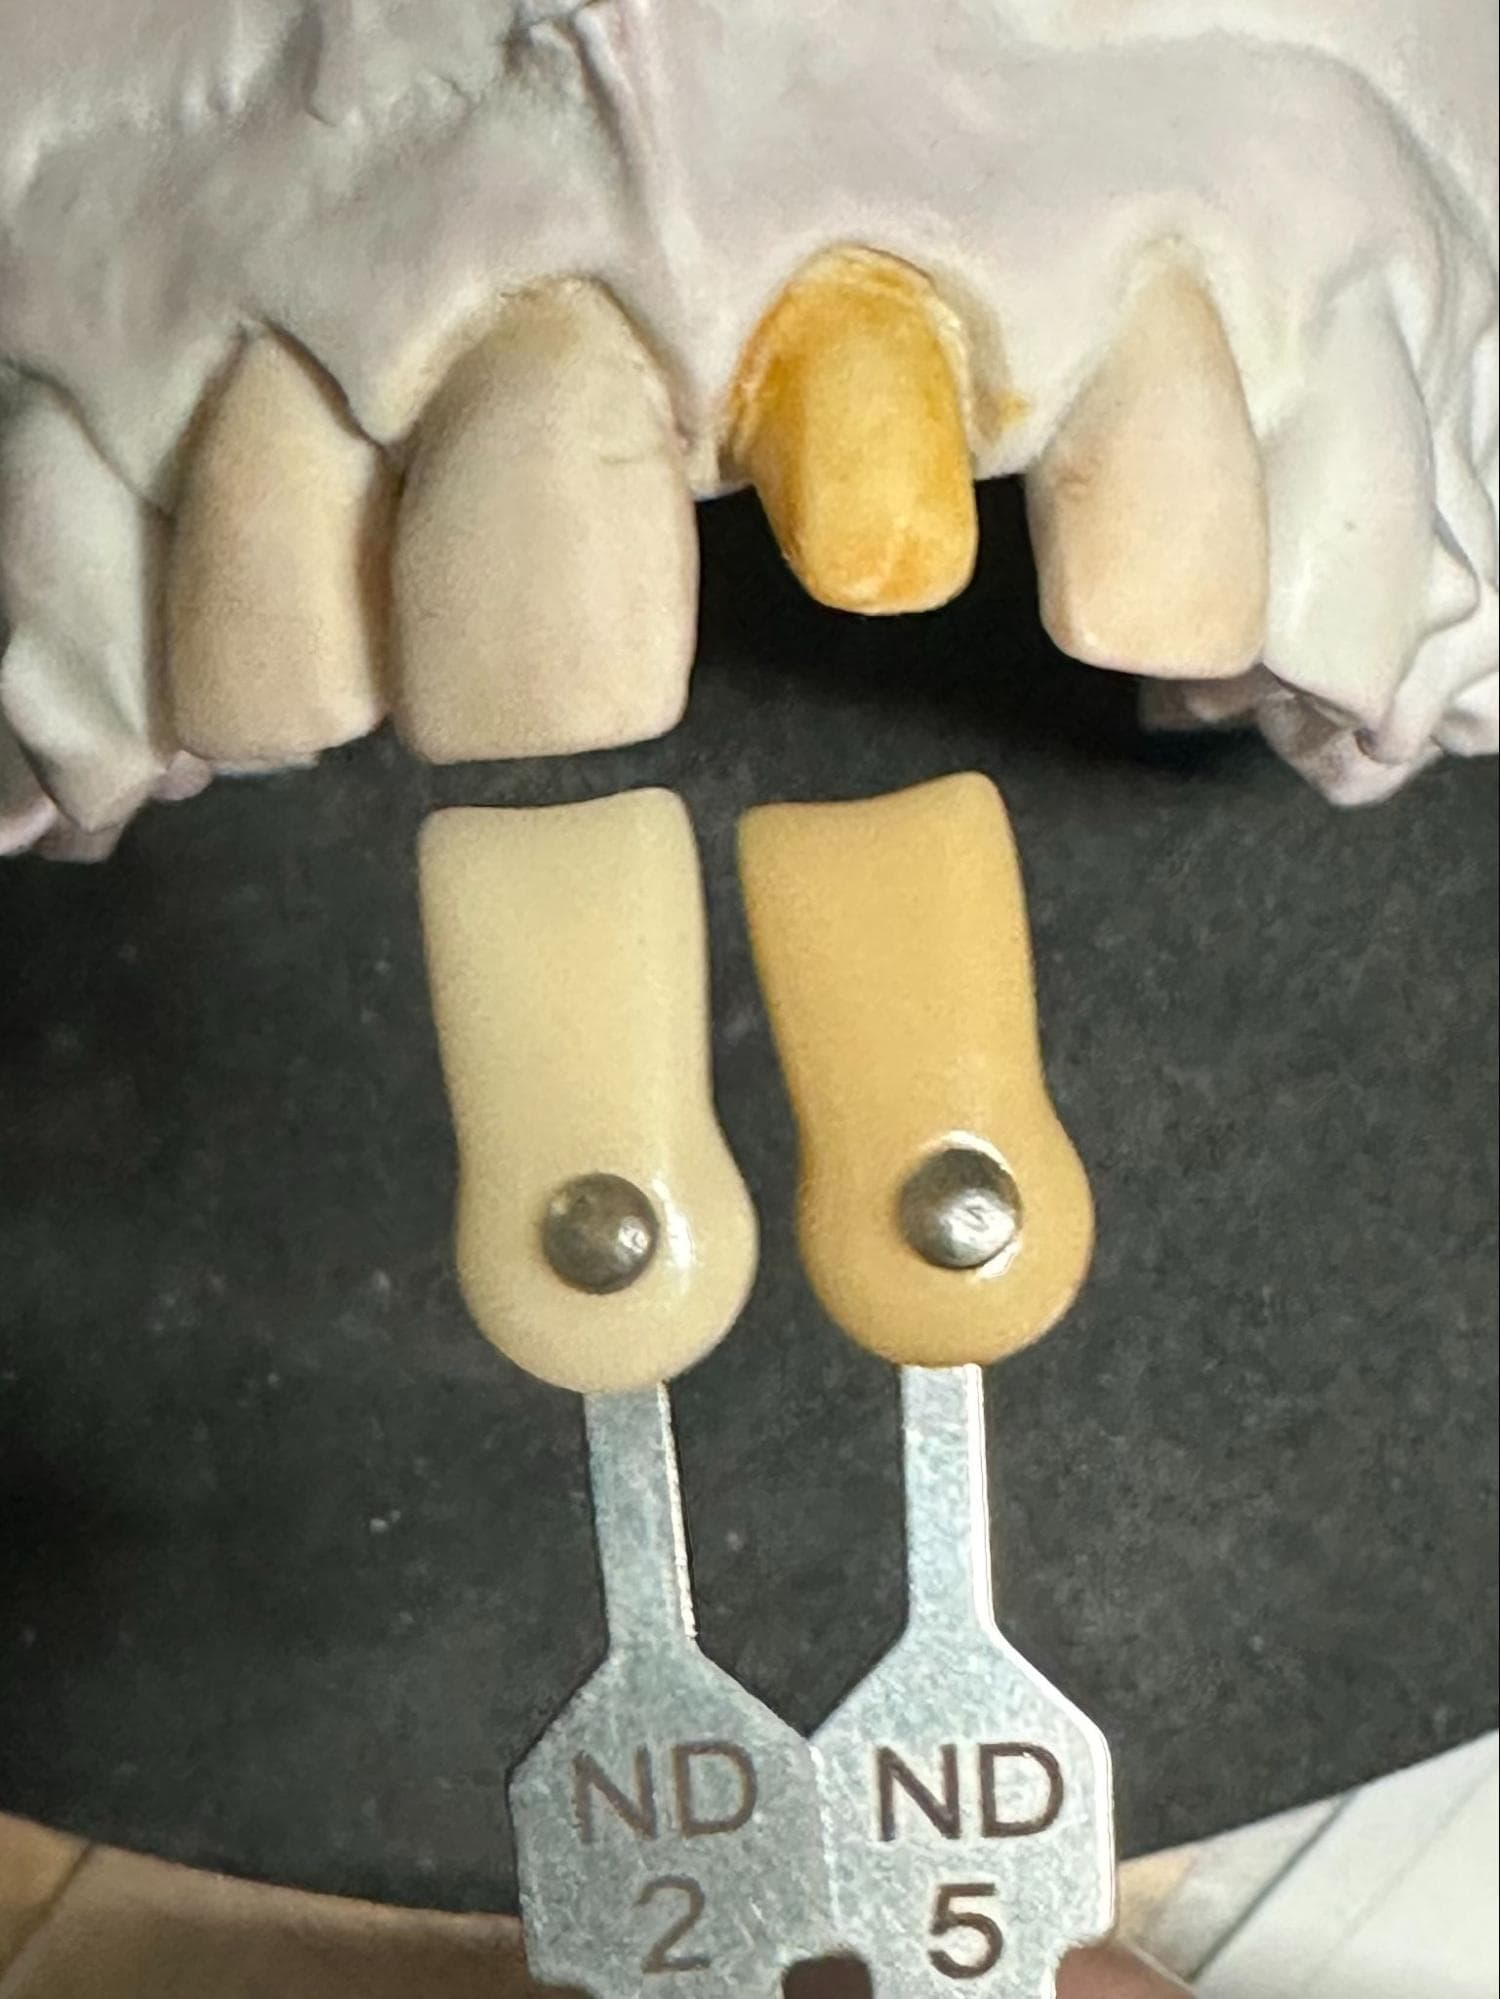
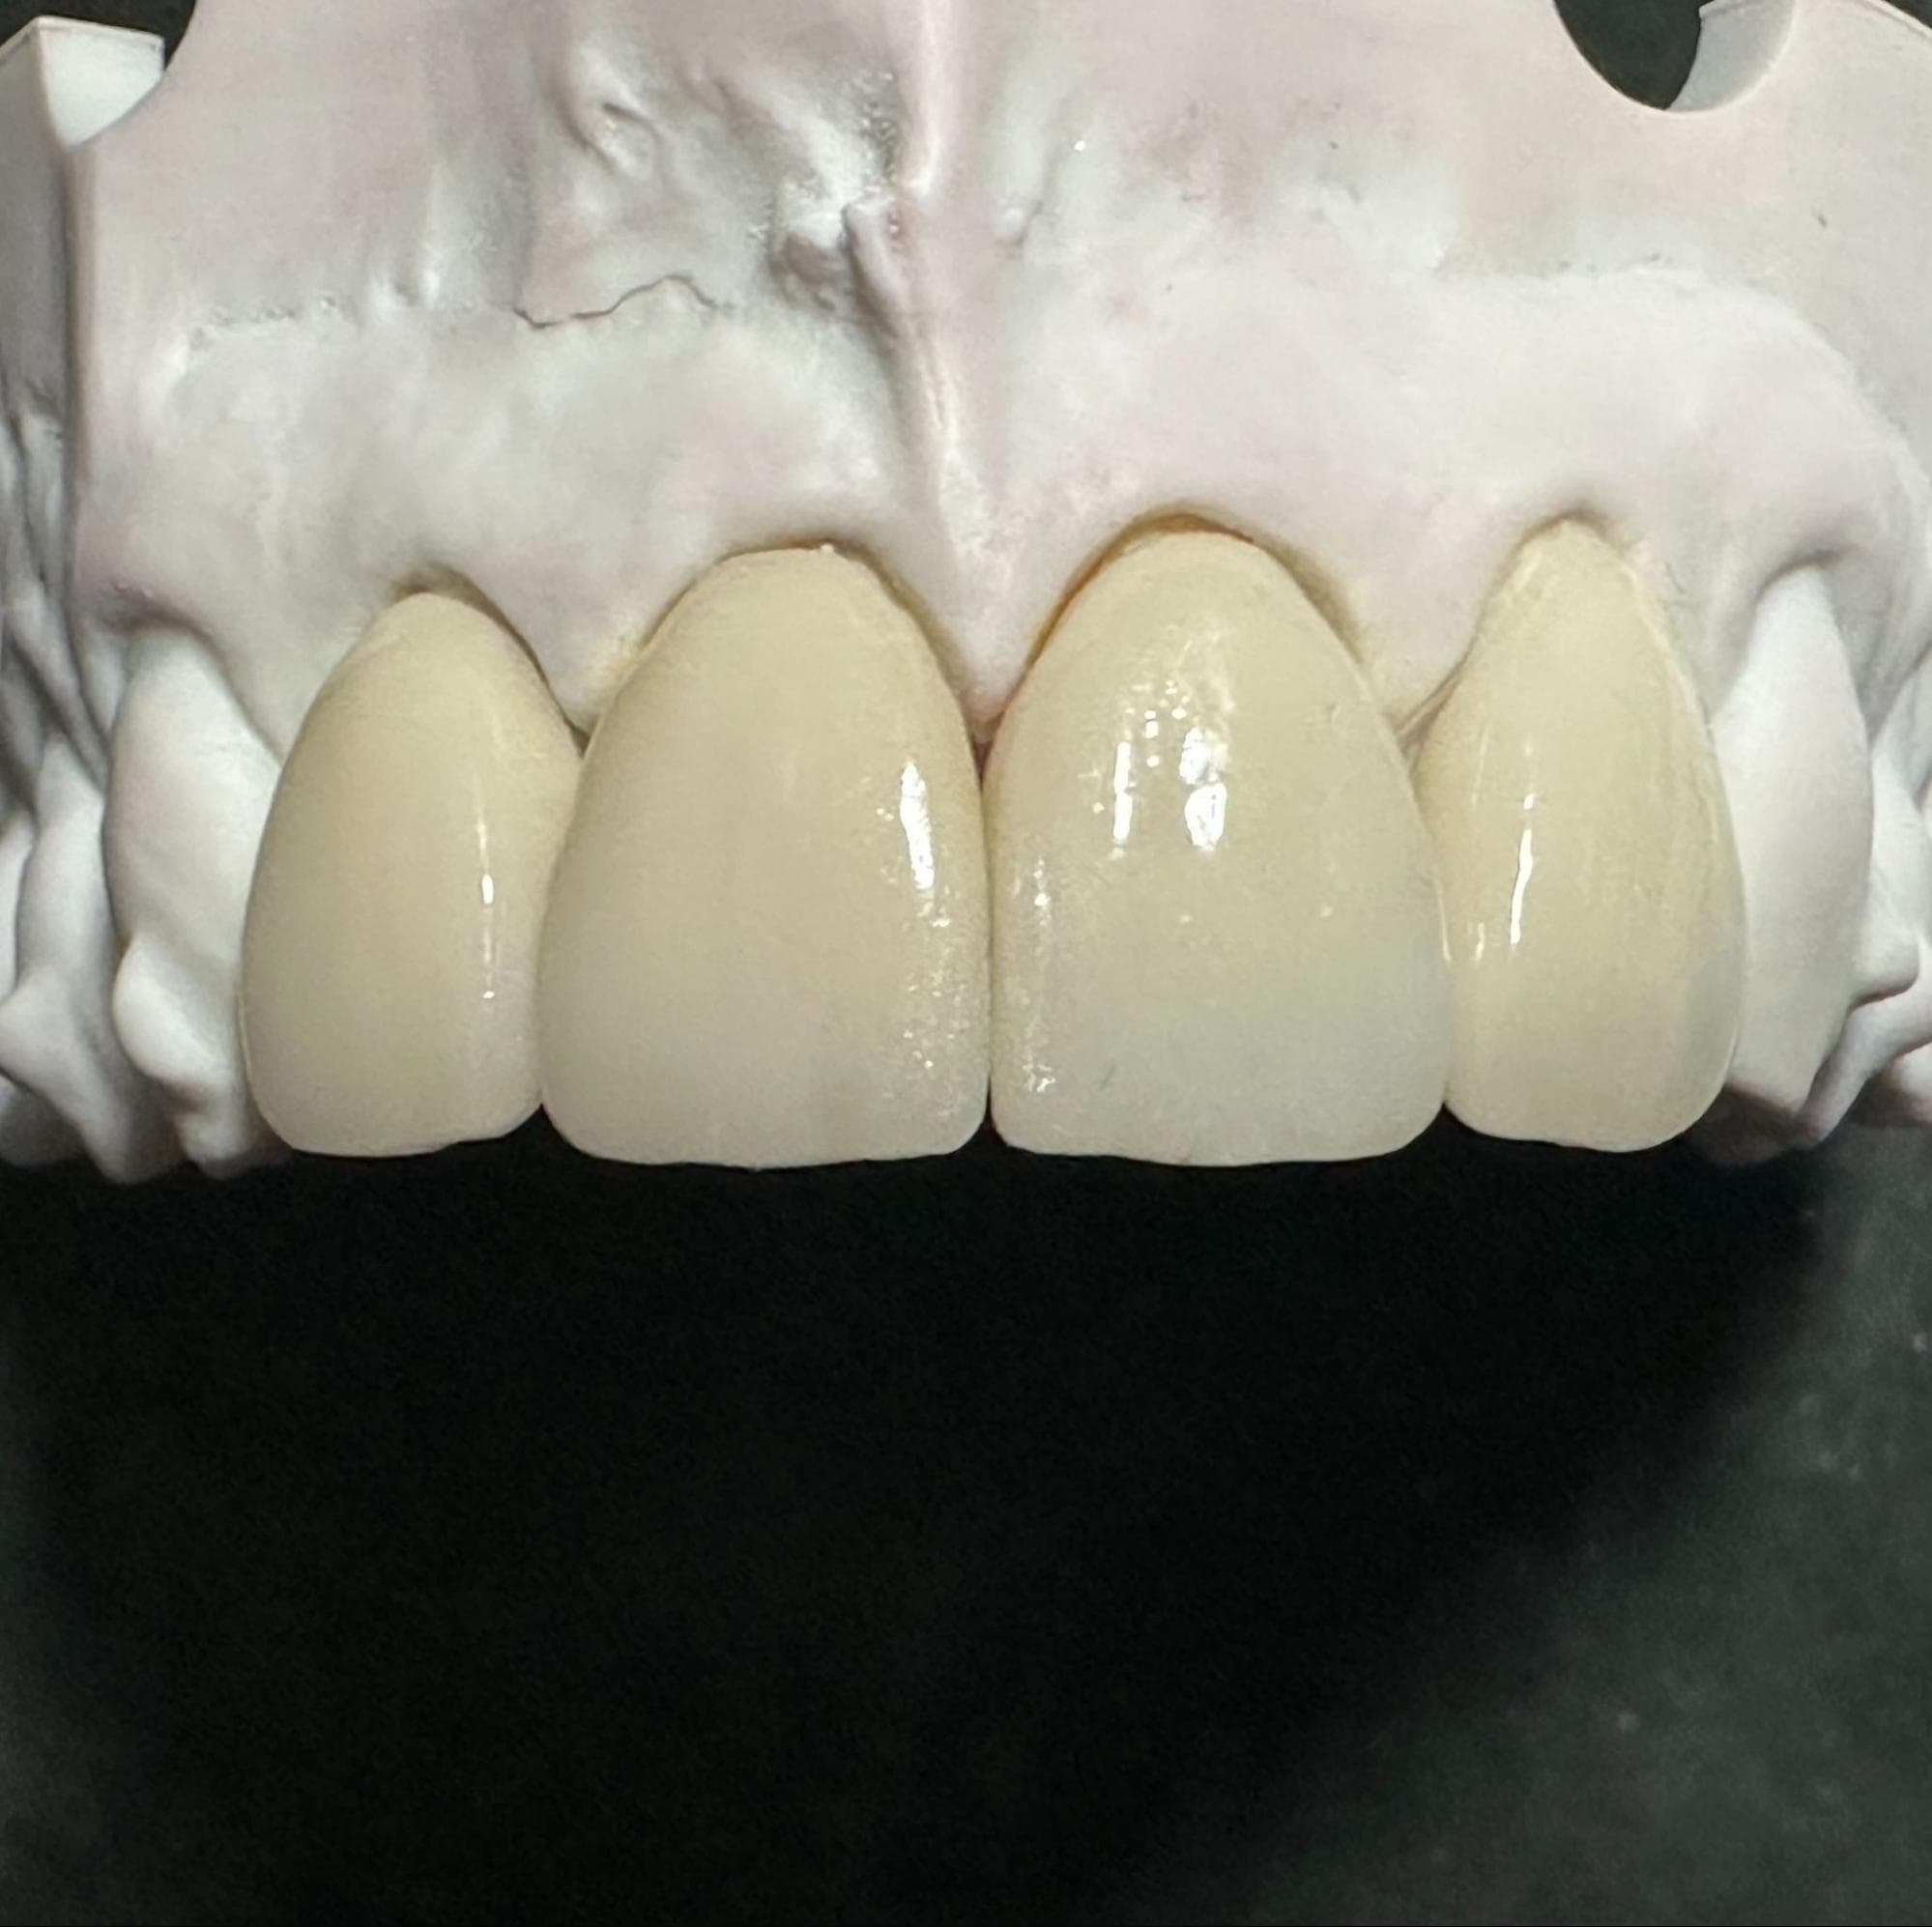
Images: Translucent crown against shade guide, ND shade guide conveying natural prep shade, and final crowns on coloured model
The Try-In Trap: What Saliva Leaves Behind
The moment a restoration is tried in the mouth, saliva contacts its fitting surface — and saliva contains phospholipids that bond readily to zirconia and other ceramic surfaces.
This matters because those same phospholipids compete for the bonding sites that MDP-containing adhesives, developed specifically to chemically bond to zirconia, rely on. A restoration can be perfectly prepared, etched, and primed before try-in, and still lose a meaningful proportion of its adhesive potential simply by being tried in and then cemented without an intermediate cleaning step.
The fix is straightforward, and increasingly considered standard of care: clean the restoration after try-in and before final cementation, using a dedicated cleaning agent.
Three well-established options:
- Ivoclean (Ivoclar Vivadent)
- Katana Cleaner (Kuraray)
- Zirclean (Bisco)
A thirty-second step, and one of the cheapest insurance policies in restorative dentistry.
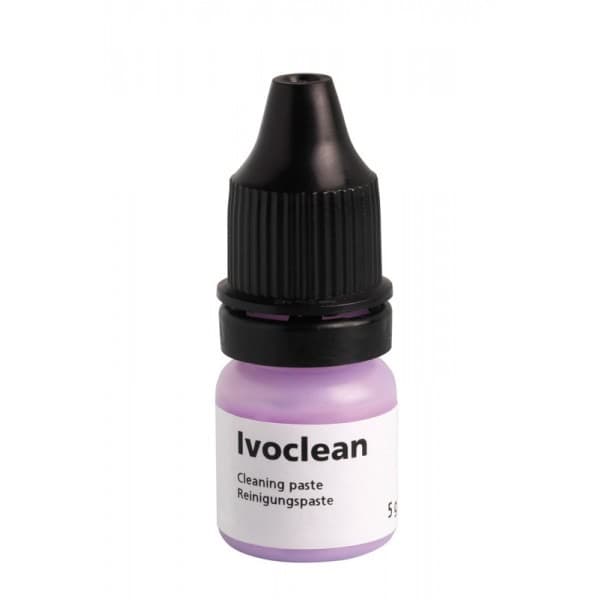
Ivoclean: Zirconia cleaning agent application step post try-in
The Shade Isn't Fixed Until It's Seated
Twenty to thirty years ago, most crowns were PFM or materials opaque enough to mask almost anything underneath them. Shade was decided largely at the porcelain stage and stayed decided, irrespective of the preps.
That's no longer true for highly translucent restorations, which are designed to mimic the optical behaviour of natural enamel. Light transmits through them and picks up colour from everything in its path, including the cement layer and whatever lies beneath it.
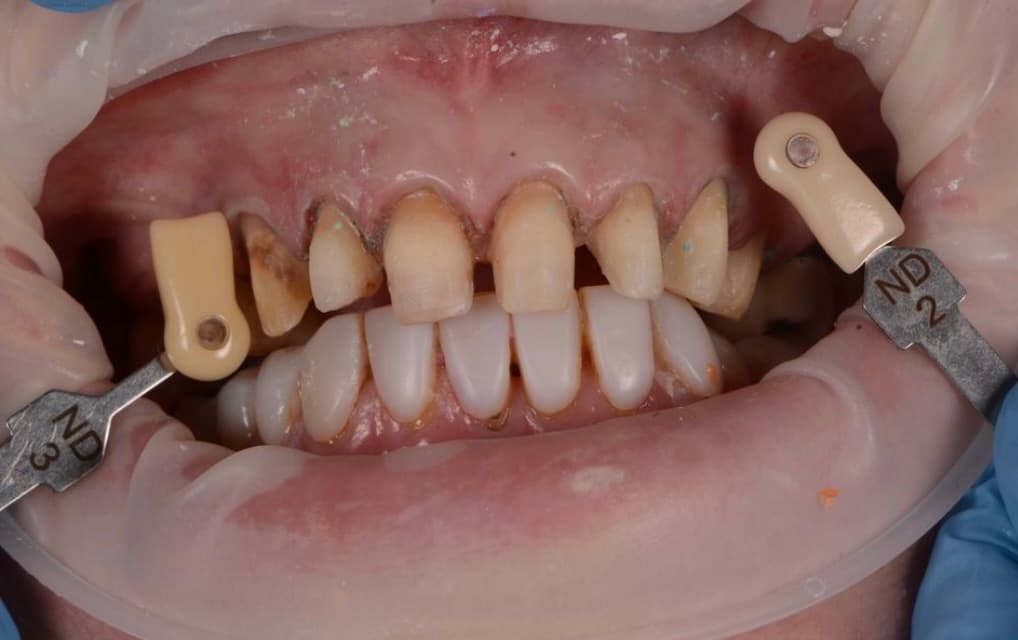
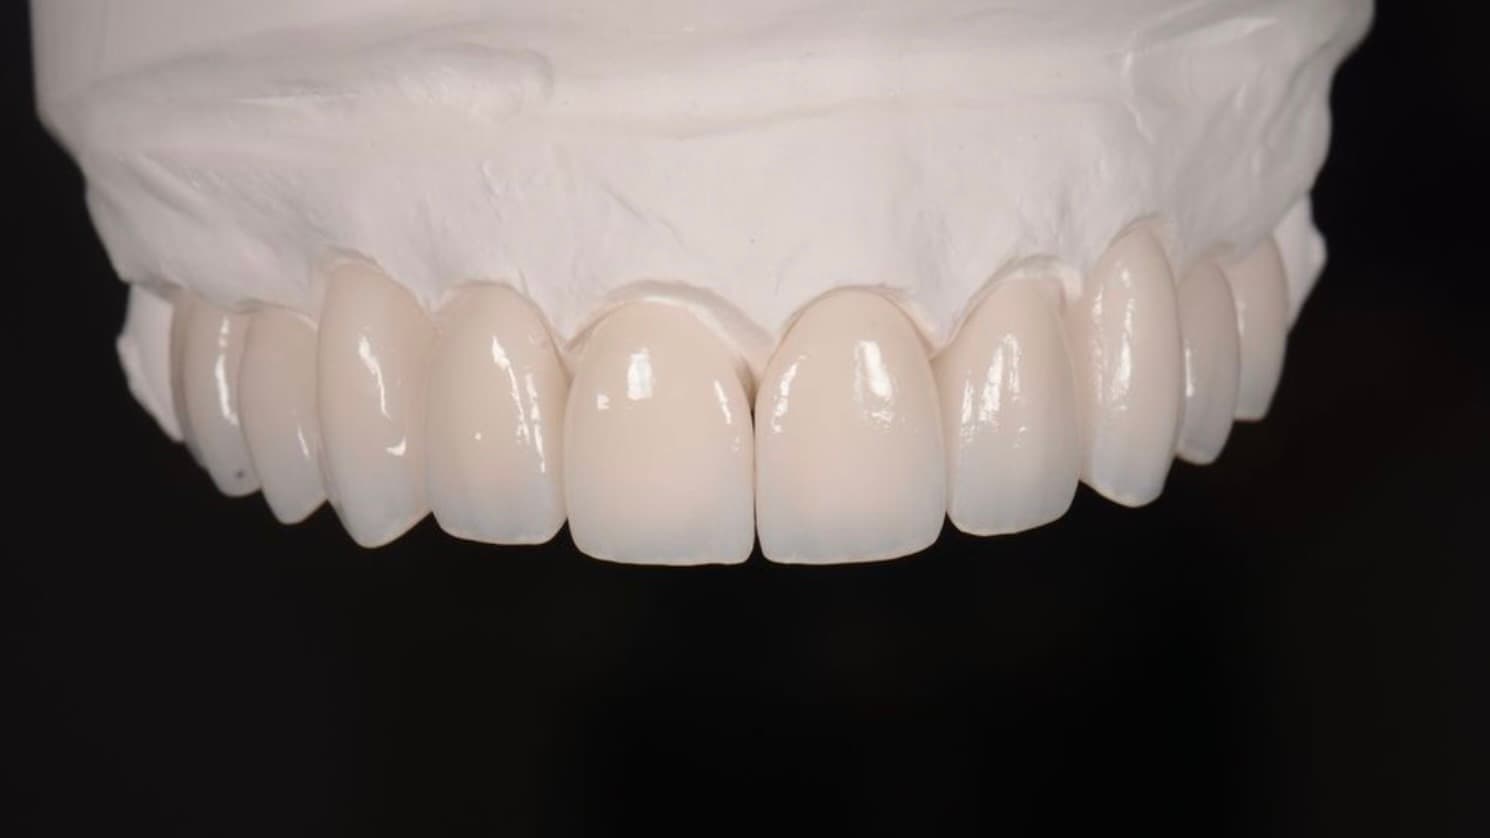
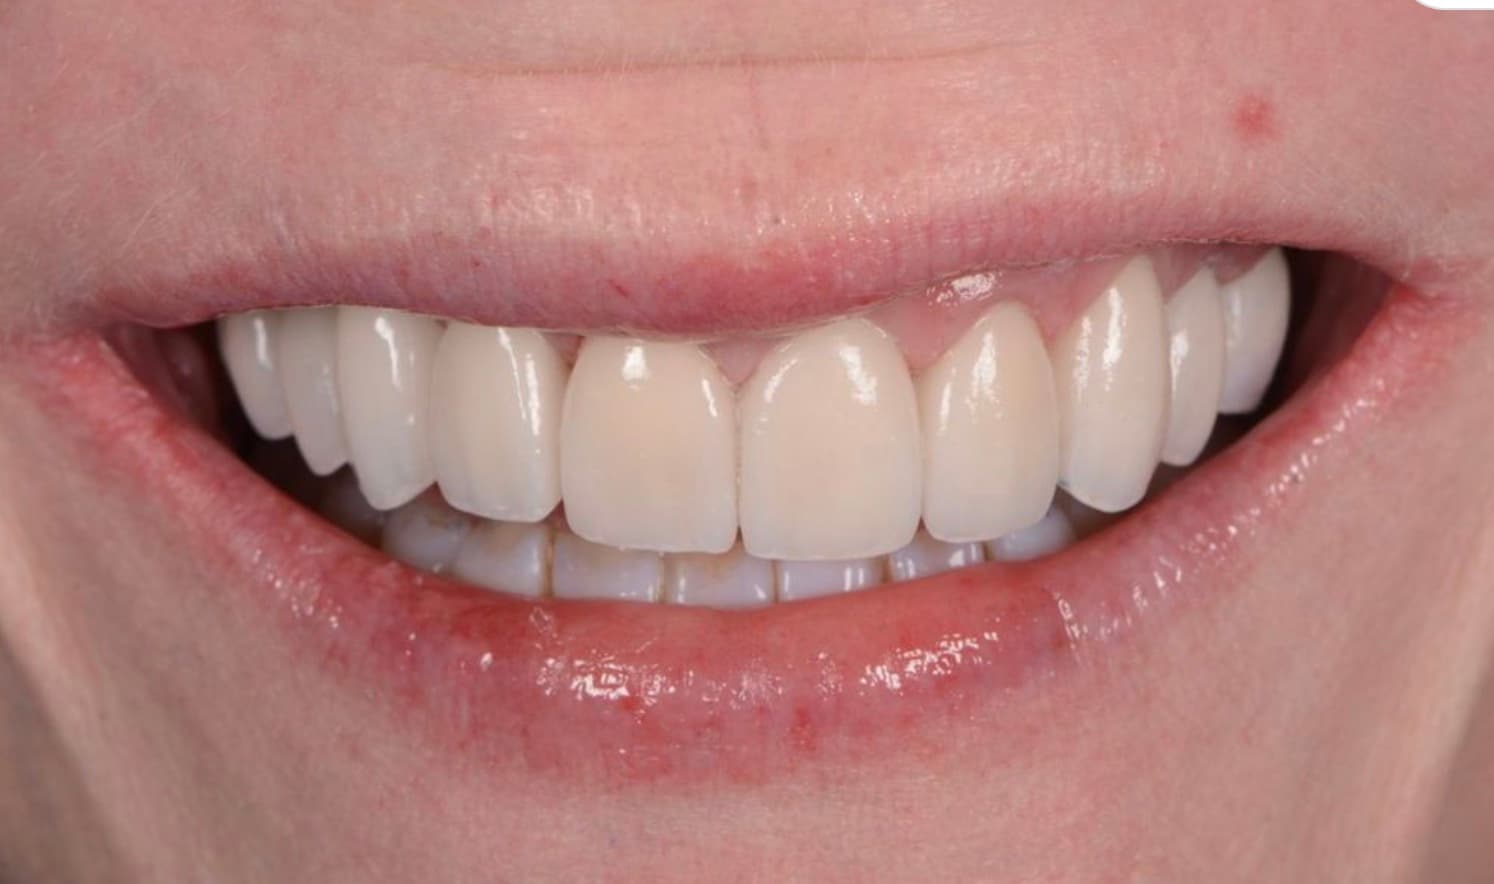
Images: 1 preps, 2 restorations & 3 restorations fitted — showing discolouration of preps affecting cemented restorations (BL3 E.max veneers on 11, 21, 22 showing browny/orange tint)
In this case the chosen shade of BL3 E.max Veneers is uniform on the model. The shade variation is more apparent on 11, 21, 22 showing through as a browny/orange tint under the translucent restorations.
The Clear Cement Mistake
It's a natural assumption: if the restoration is translucent, surely a clear or translucent cement is the safest, most "invisible" choice underneath it?
In practice, it's often the opposite — and one of the most common shade failures we see traced back to cementation.
Translucent restorations are engineered to reflect and refract light in a specific way, mimicking how natural enamel scatters light back to the viewer's eye to create depth, vitality, and maintain the correct final shade.
A clear or translucent cement disrupts this in two damaging ways:
- It allows the colour of whatever lies beneath — like a discoloured stump, an old darkened core, a metal abutment or amalgam — to shine through the restoration.
- It can trap and absorb light that was meant to be reflected outward, effectively deadening the restoration's vitality rather than enhancing it.
The result is a crown that looks dull, grey, or oddly translucent in a way that reads as "off" even when the ceramic itself was built to the correct shade. This is precisely why shade-matched, opaque-appropriate resin cements exist as a distinct category; they're not a compromise on aesthetics, they're what makes the aesthetics work as intended.
Bond Failure: Matching Pre-Treatment to Materials
Different ceramics require fundamentally different surface treatments — and getting the wrong one, or skipping it, is one of the most common causes of early bond failure.
E.max and other Lithium Disilicates are etched post-finish with a 5–8% hydrofluoric acid solution, creating the classic honeycomb micro-retentive surface that resin cements key into beautifully (with the optional addition of a Silane coupling agent to bond glass and ceramic surfaces to resin-based luting composites).
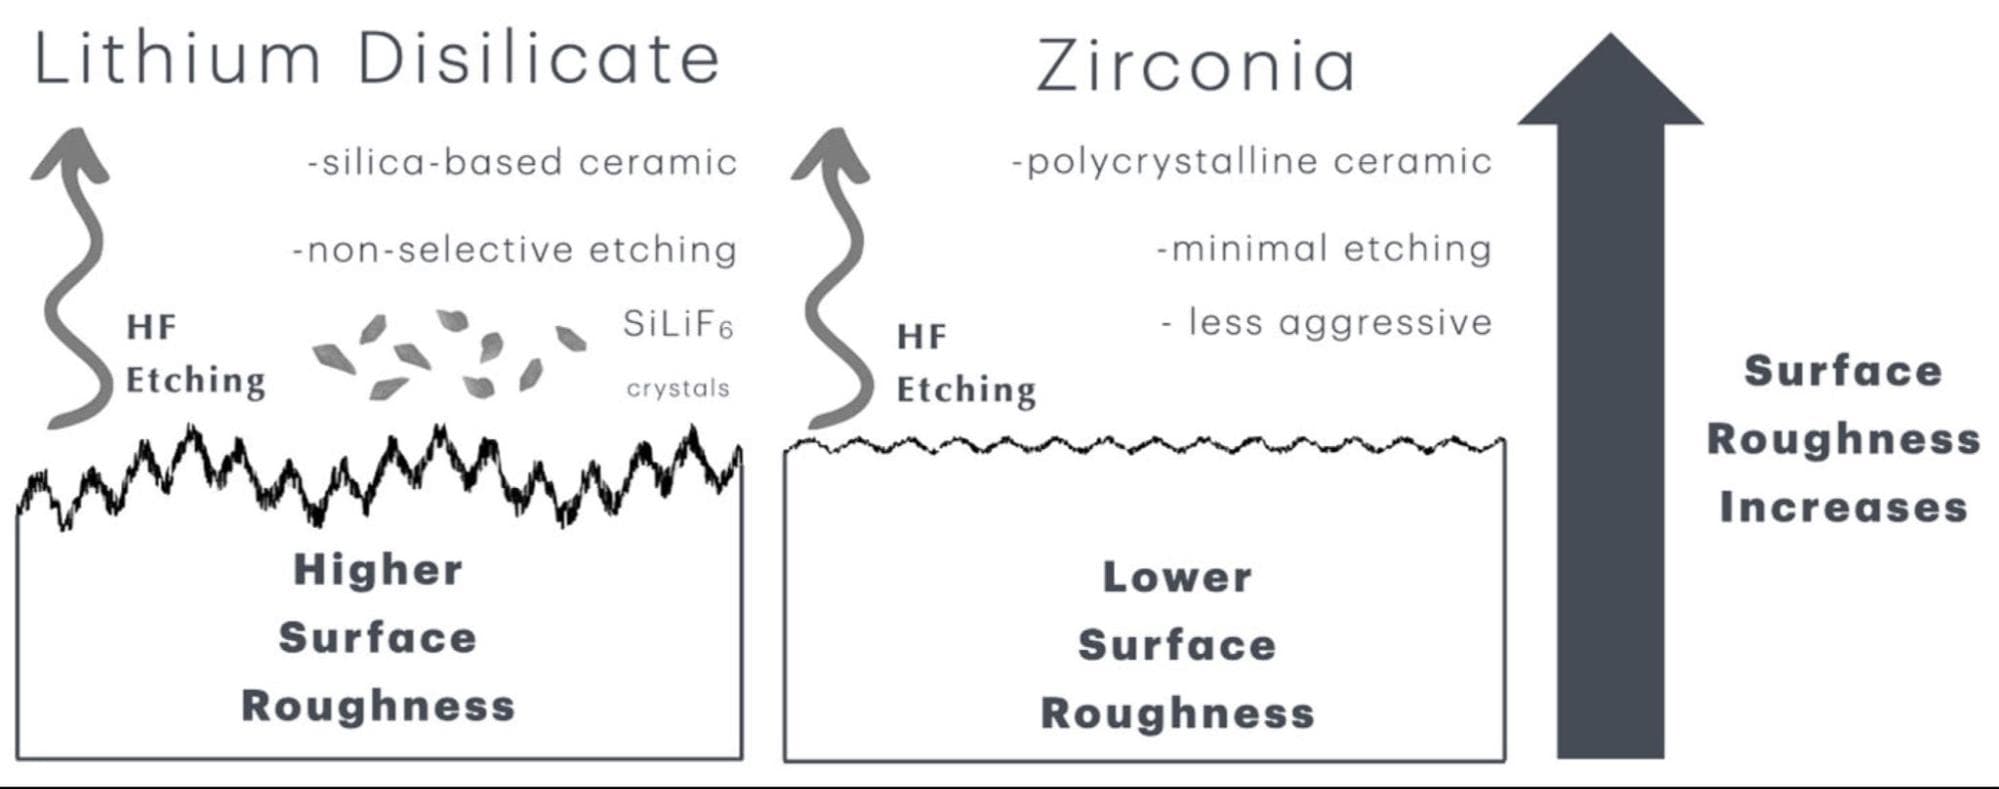
E.max and other lithium disilicate micro-retentive etched surface
Zirconia cannot be etched with hydrofluoric acid. Sulphuric acid will etch Zirconia, however it takes 2–3 hours. The crystalline structure doesn't respond to etching the way glass-ceramics do. Instead, Zirconia can only be effectively etched at the pre-sinter stage, using a specialist liquid such as Z-Etch (by IDS CAD, USA only) or Zirface (by DMAX) applied before the final sintering firing. Once sintered, zirconia relies on MDP-containing primers and adhesives for chemical bonding rather than mechanical micro-retention.
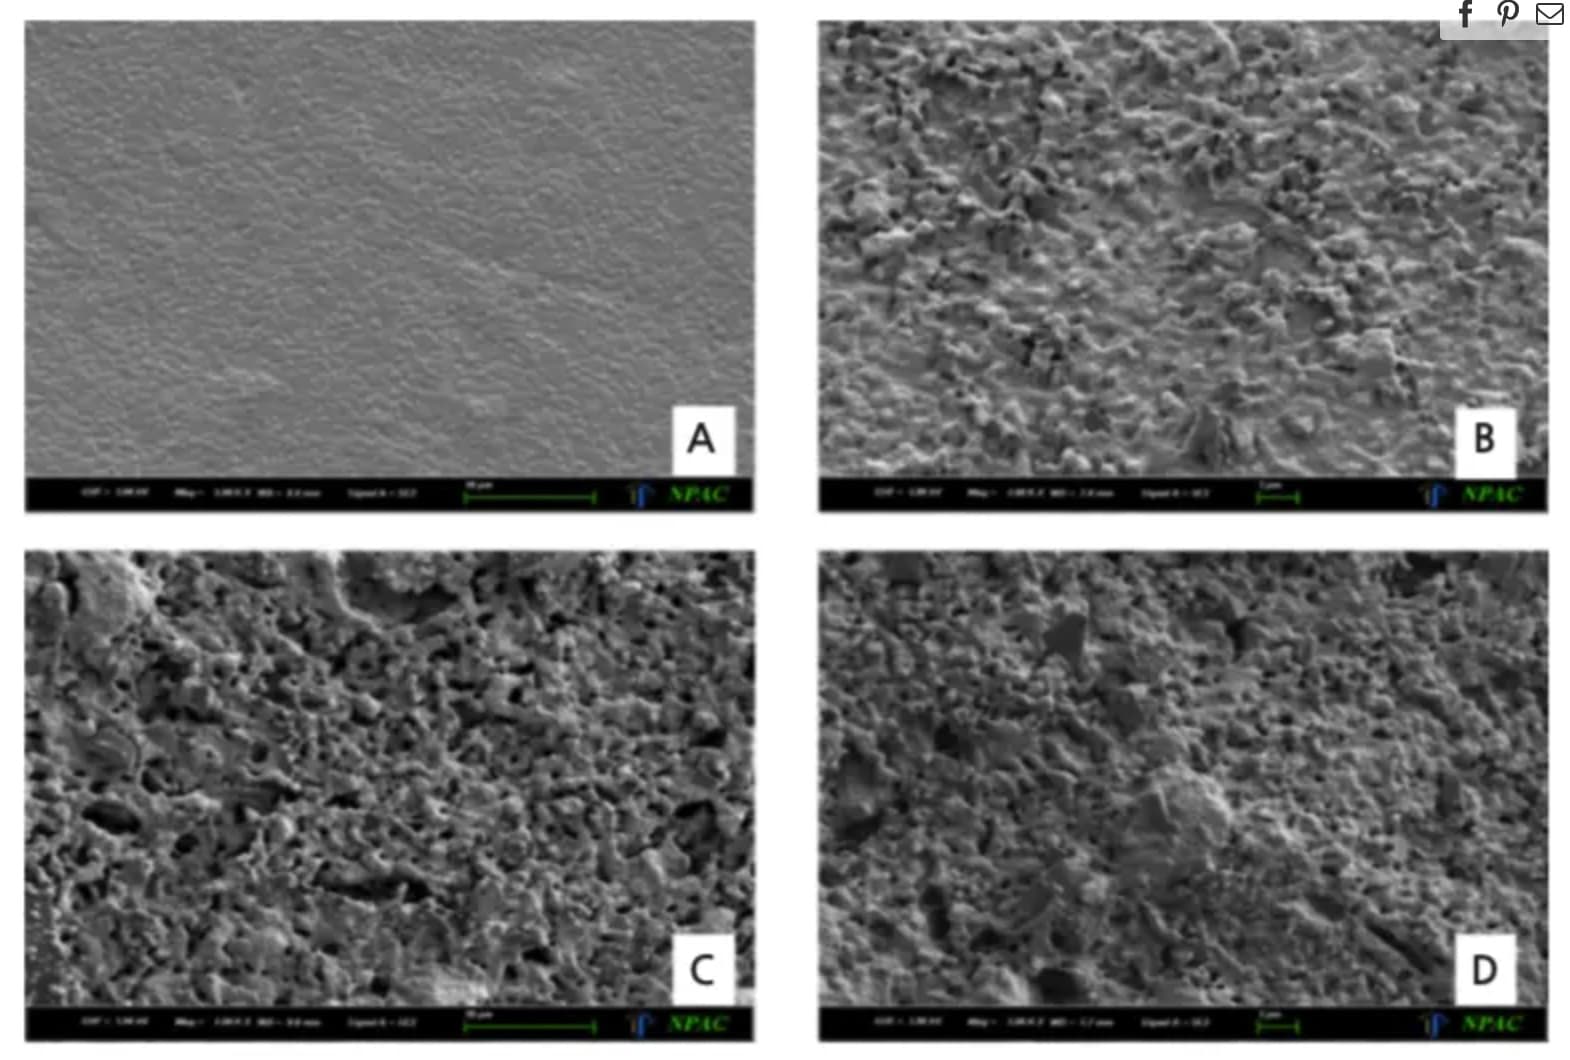
Zirconia pre-sinter etching — A: Datum 0 Etch | B: 15% | C: 30% | D: 45%
Masking What's Underneath: Opaque Liquid Systems
Thin zirconia restorations bring a further challenge: with reduced material thickness comes increased translucency, and increased visibility of whatever lies beneath — a discoloured natural stump, a darkened post and core, or a metal implant abutment.
Aidite's Biomic Color Opaque Liquids address this: directly painted onto the internal surface of the restoration at the pre-sintered stage, it masks dark or unwanted discolouration from the underlying prep while taking up zero physical space within the restoration itself. Where a case involves a challenging stump shade, this kind of internal masking can be the difference between a restoration that blends and one that betrays what's underneath it.
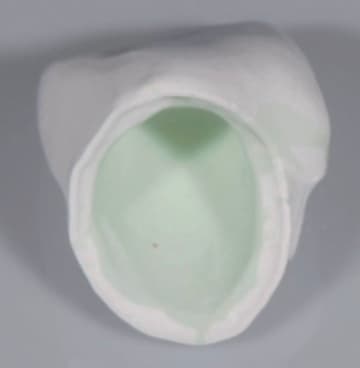
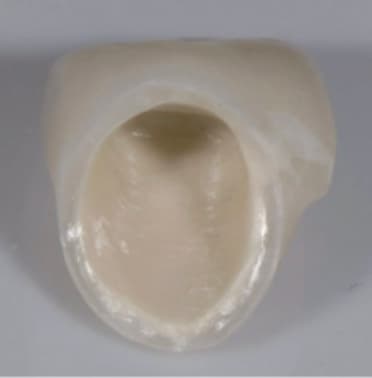
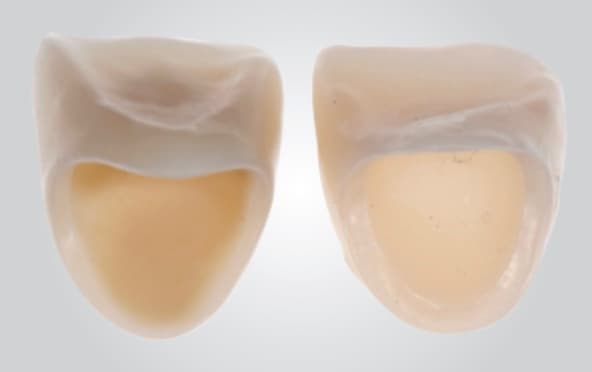
Internal surface of zirconia coping with opaque liquid applied pre-sinter and post-sinter (Images 1 & 2), and true opacity gained (Image 3)
Match the Cement to the Material
| Material | Cement Approach | Avoid |
|---|---|---|
| Translucent Zirconias (Such as Fusion-Zirconia) | Shade-matched resin cement; clean post try-in (Ivoclean / Katana Cleaner / Zirclean) | Clear/translucent cement |
| E.max / Lithium Disilicate | HF-etched + silane; shade-matched adhesive resin cement | Clear/translucent cement |
| Feldspathic Porcelain | HF-etched + silane; shade-matched adhesive resin cement | Clear/translucent cement |
| Hybrid Ceramics | Manufacturer-specific; often universal adhesive, shade-matched | Clear/translucent cement |
| Composite Restorations | Compatible resin cement (check chemical compatibility) | Incompatible formulations |
Standard Advice: 7 Steps to Cementation Success
- 1. Identify the restorative material before choosing a cement — never the other way round.
- 2. Clean the fitting surface after try-in — phospholipid contamination is invisible but real.
- 3. Etch appropriately for the material — HF acid for glass-ceramics, Zirface pre-sinter etch for zirconia.
- 4. Match cement shade and opacity to the required outcome, not just what's on the shelf.
- 5. Never default to clear/translucent cement on aesthetic-zone restorations — it invites show-through and deadens light return.
- 6. Consider internal masking (e.g. Aidite ACL5C / Biomic Color Opaque) for thin, translucent restorations over discoloured substrates.
- 7. When in doubt, ask your laboratory — we'd rather answer the question than repair the result…
The Ambridge Standard is published in the belief that a well-informed dentist and a well-informed technician produce, without exception, the better restoration.
Ambridge Ceramics Ltd, Ripon, North Yorkshire
Talk a Case Through With Us
Have a case where the material choice is in question? Get in touch before work begins , we are always happy to discuss indications, options and anticipated outcomes.
Send a case →Ambridge Ceramics
A multi‑award‑winning UK dental laboratory based in Ripon, North Yorkshire.
Premier House, Kiln Court, College Rd, Ripon HG4 2BP, United Kingdom
- Digital accuracy supported by human expertise.
- Technician‑led decision‑making at every stage.
- Materials chosen for longevity, not convenience.
- Aesthetic outcomes guided by real‑world function.
- The Foundation of Excellence
- Material Intelligence
- Digital Precision
- Hand-Finished Excellence
- Graduated Density
- Shade Matching & Characterisation
- Screw‑mentable Implant Restorations
- The Collective Bench
- Ambridge and the Esthetic Zone
- A Bond That Lasts: The Overlooked Science of Cementation(we are here)
- The Blueprint Beneath: Why the Preparation Decides the Restoration
- MIND THE GAP (Ortho-Resto) With AC Aligners