
The Blueprint Beneath: Why the Preparation Decides the Restoration
THE BEST CERAMIC IN THE WORLD CAN'T ADD WHAT THE PREP TOOK AWAY !
In our last issue we followed a restoration to the very end of its journey, the moment of cementation. This time we go back to the very beginning, to the moment the first bur touches the tooth.
When a crown looks bulky, reads too opaque or chips within its first year, the ceramic usually takes the blame. More often than not, the story was written long before the case reached the lab. The preparation decides how much room the technician has, how strong the finished restoration can be, and how naturally it will handle light.
After more than four decades at the bench, one truth keeps returning. Give a technician "enough room" or the right space and the right shape, and the material will do everything it was engineered to do. Take that space away, and even the finest Fusion Zirconia or E.max becomes a compromise.
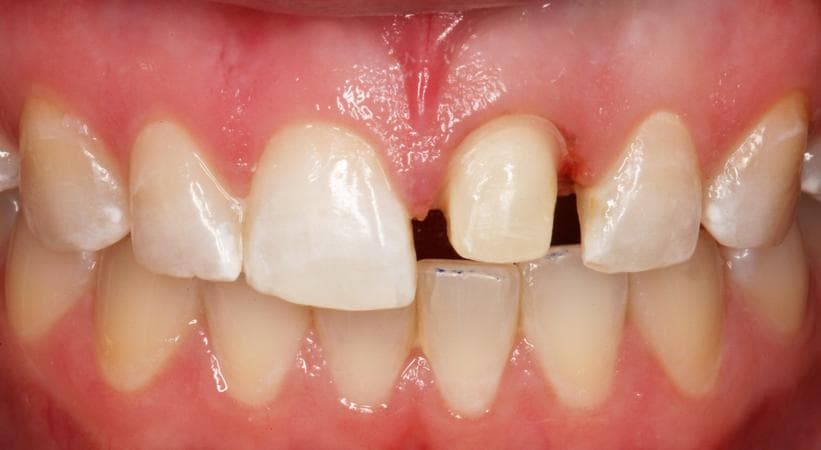
a well-prepared tooth on the model, smooth rounded margins clearly visible
Space is Shade
Colour in a modern restoration is not painted on the surface. It is built in depth, from a warm, chromatic dentine core out to a translucent enamel edge. That depth needs physical room.
With too little reduction, the technician is left with two poor choices. Either over-contour the restoration to fit the colour in, or thin it down until the underlying stump begins to show through. As we saw in Issue 10, a translucent restoration behaves like a window rather than a wall. A thin window hides nothing.
Where a prep is dark, discoloured, or built on an old post and core, it needs either extra thickness or internal masking such as Aidite's opaque liquid. Both need planning before the prep is cut, not after the crown comes back looking grey.
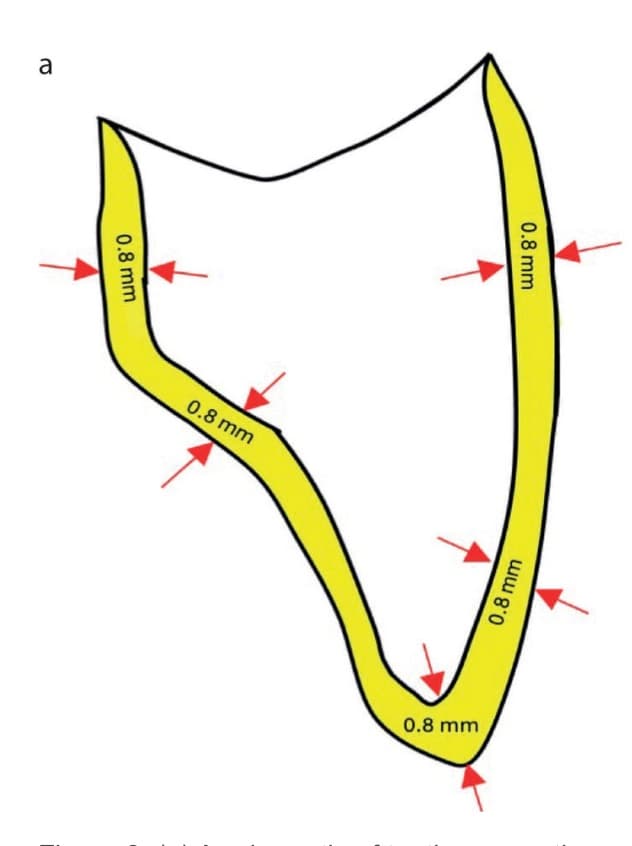
Cross-section showing optimum prep reduction for an all-ceramic restoration
Space is Strength
Every ceramic has a minimum thickness below which it stops behaving as designed. Push Fusion Zirconia, lithium disilicate or feldspathic porcelain below that limit, and the result is chipping, cracking or outright fracture, often months after fit.
Bridges bring an extra demand: the connectors. The joint between a pontic and its abutment carries enormous load, and it can only be as strong as the height and width the prep allows. A short clinical crown or a tight embrasure leaves too little room, however clever the design.
Shape is Fit: What the Milling Bur Can't Reach
Almost every restoration that leaves Ambridge today begins life on a screen and a milling machine. A milling bur is round, and it has a fixed diameter. It simply cannot cut a sharp internal corner.
When a preparation has sharp line angles, a knife-edge incisal or a jagged margin, the CAD software must compensate. It either leaves a gap, or over-mills the fitting surface to clear the corner. Either way the restoration rocks, sits high, or needs adjusting at the chair.
Soft, rounded internal angles and a smooth, flowing finish line mill accurately, seat cleanly, and leave an even cement space all round, which, as Issue 10 showed, is exactly what a good bond needs.
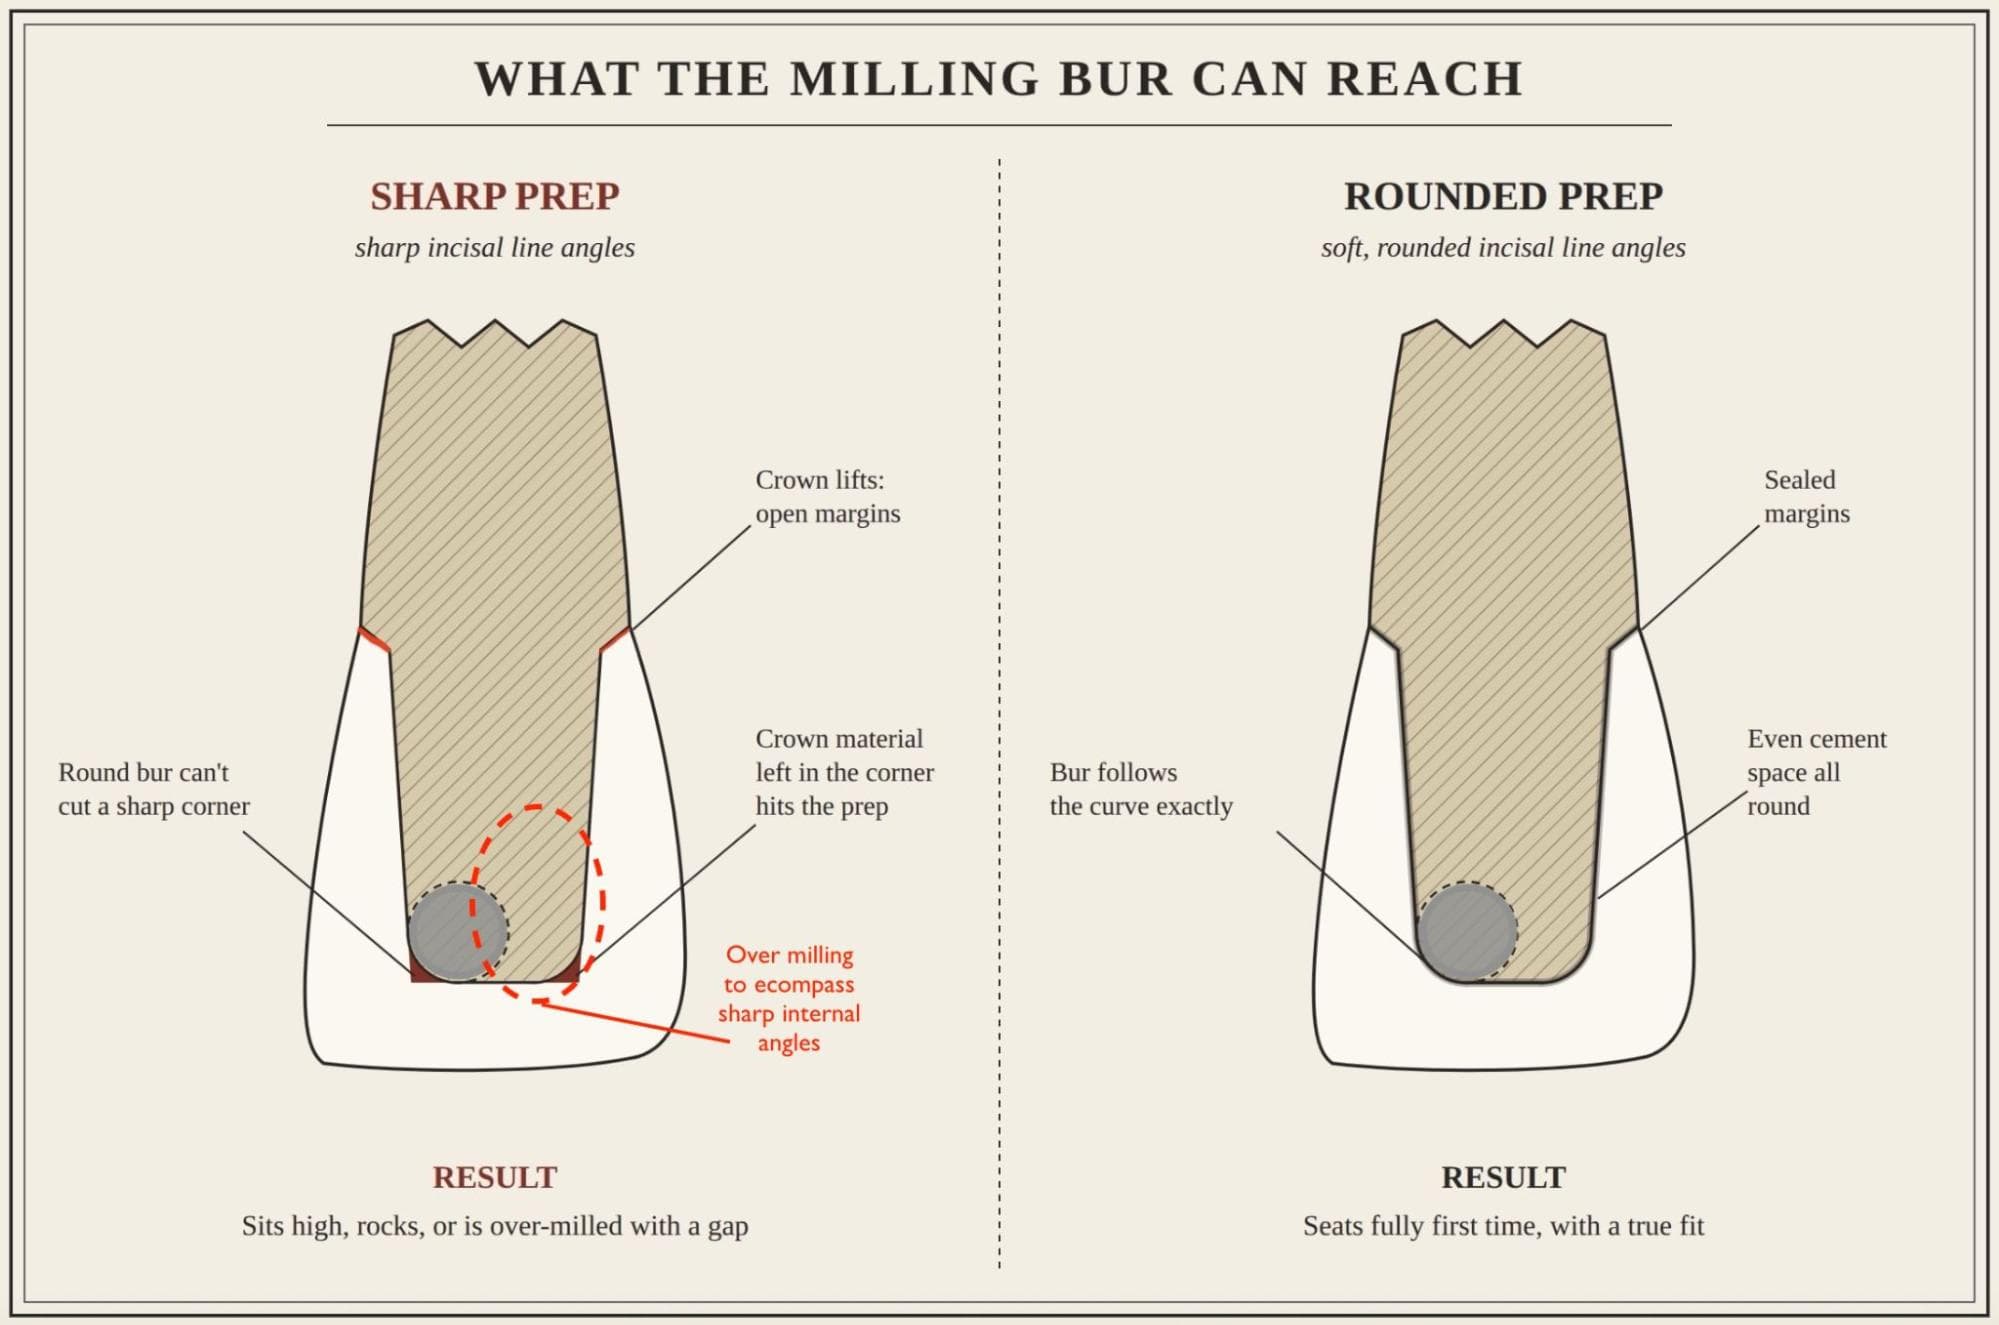
Sharp-angled prep vs Rounded prep. NB: a milling bur being rounded on the tip cannot reproduce a sharp internal angle, so has to 'Overmill' to compensate (dotted line). This can cause thin spots where space is limited.
The Margin Tells the Story
The finish line is where the restoration meets the tooth, and where most long-term problems begin. A clear, continuous, smooth margin gives the technician a definite line to design to, and gives the patient a sealed, invisible, cleansable join.
With intra-oral scanning, this matters more than ever. A scanner can only record what it can see. A margin hidden under gingiva, blood or saliva is not captured at all, and the technician is left designing to a best guess.
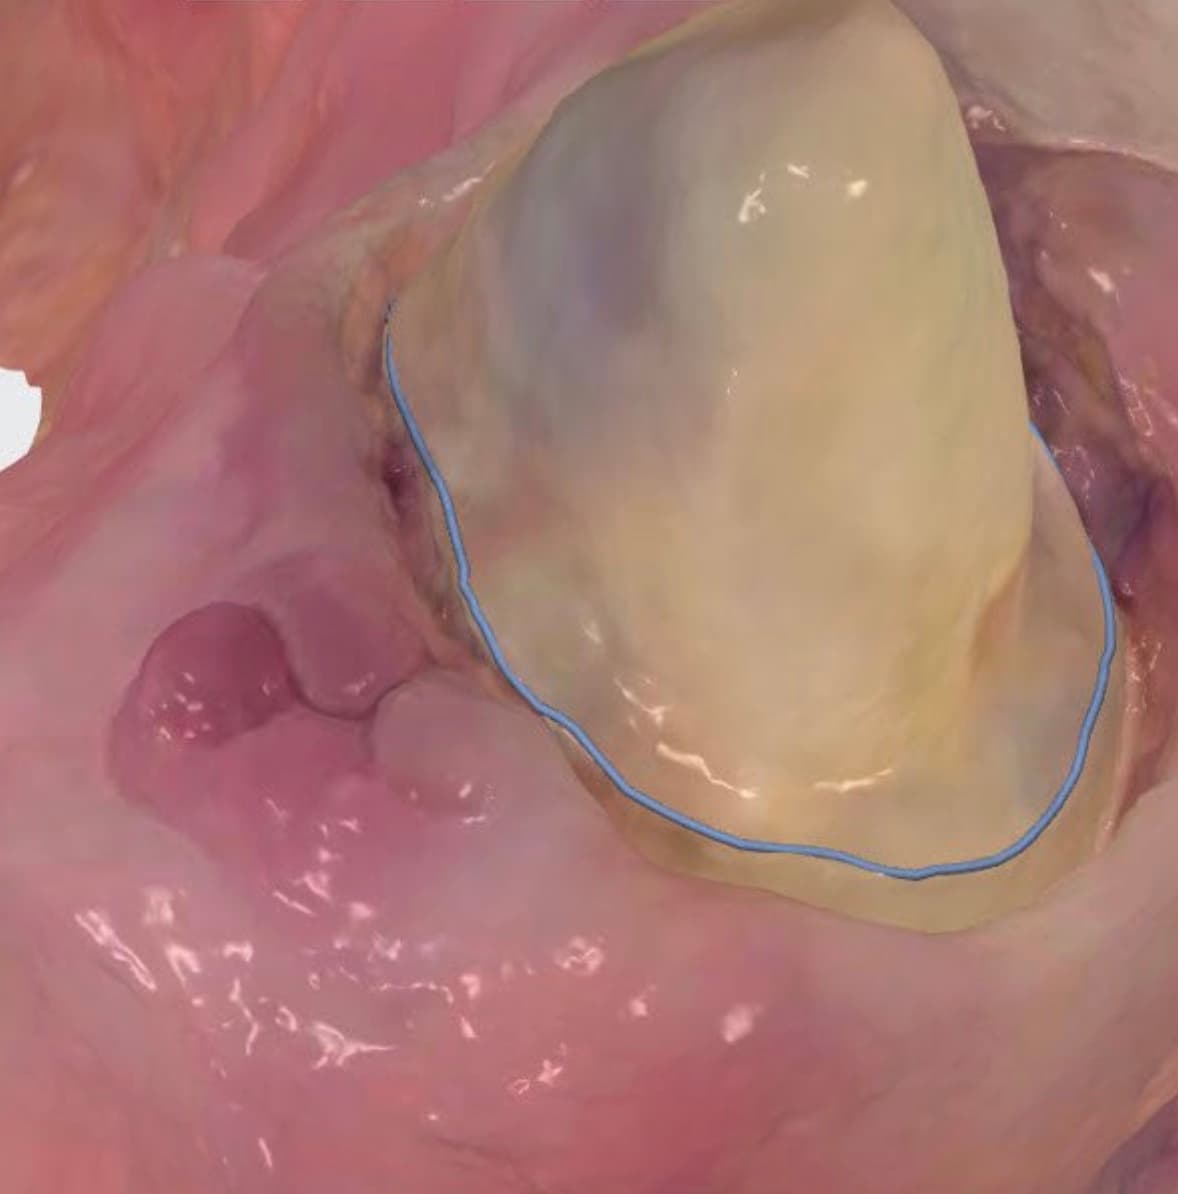
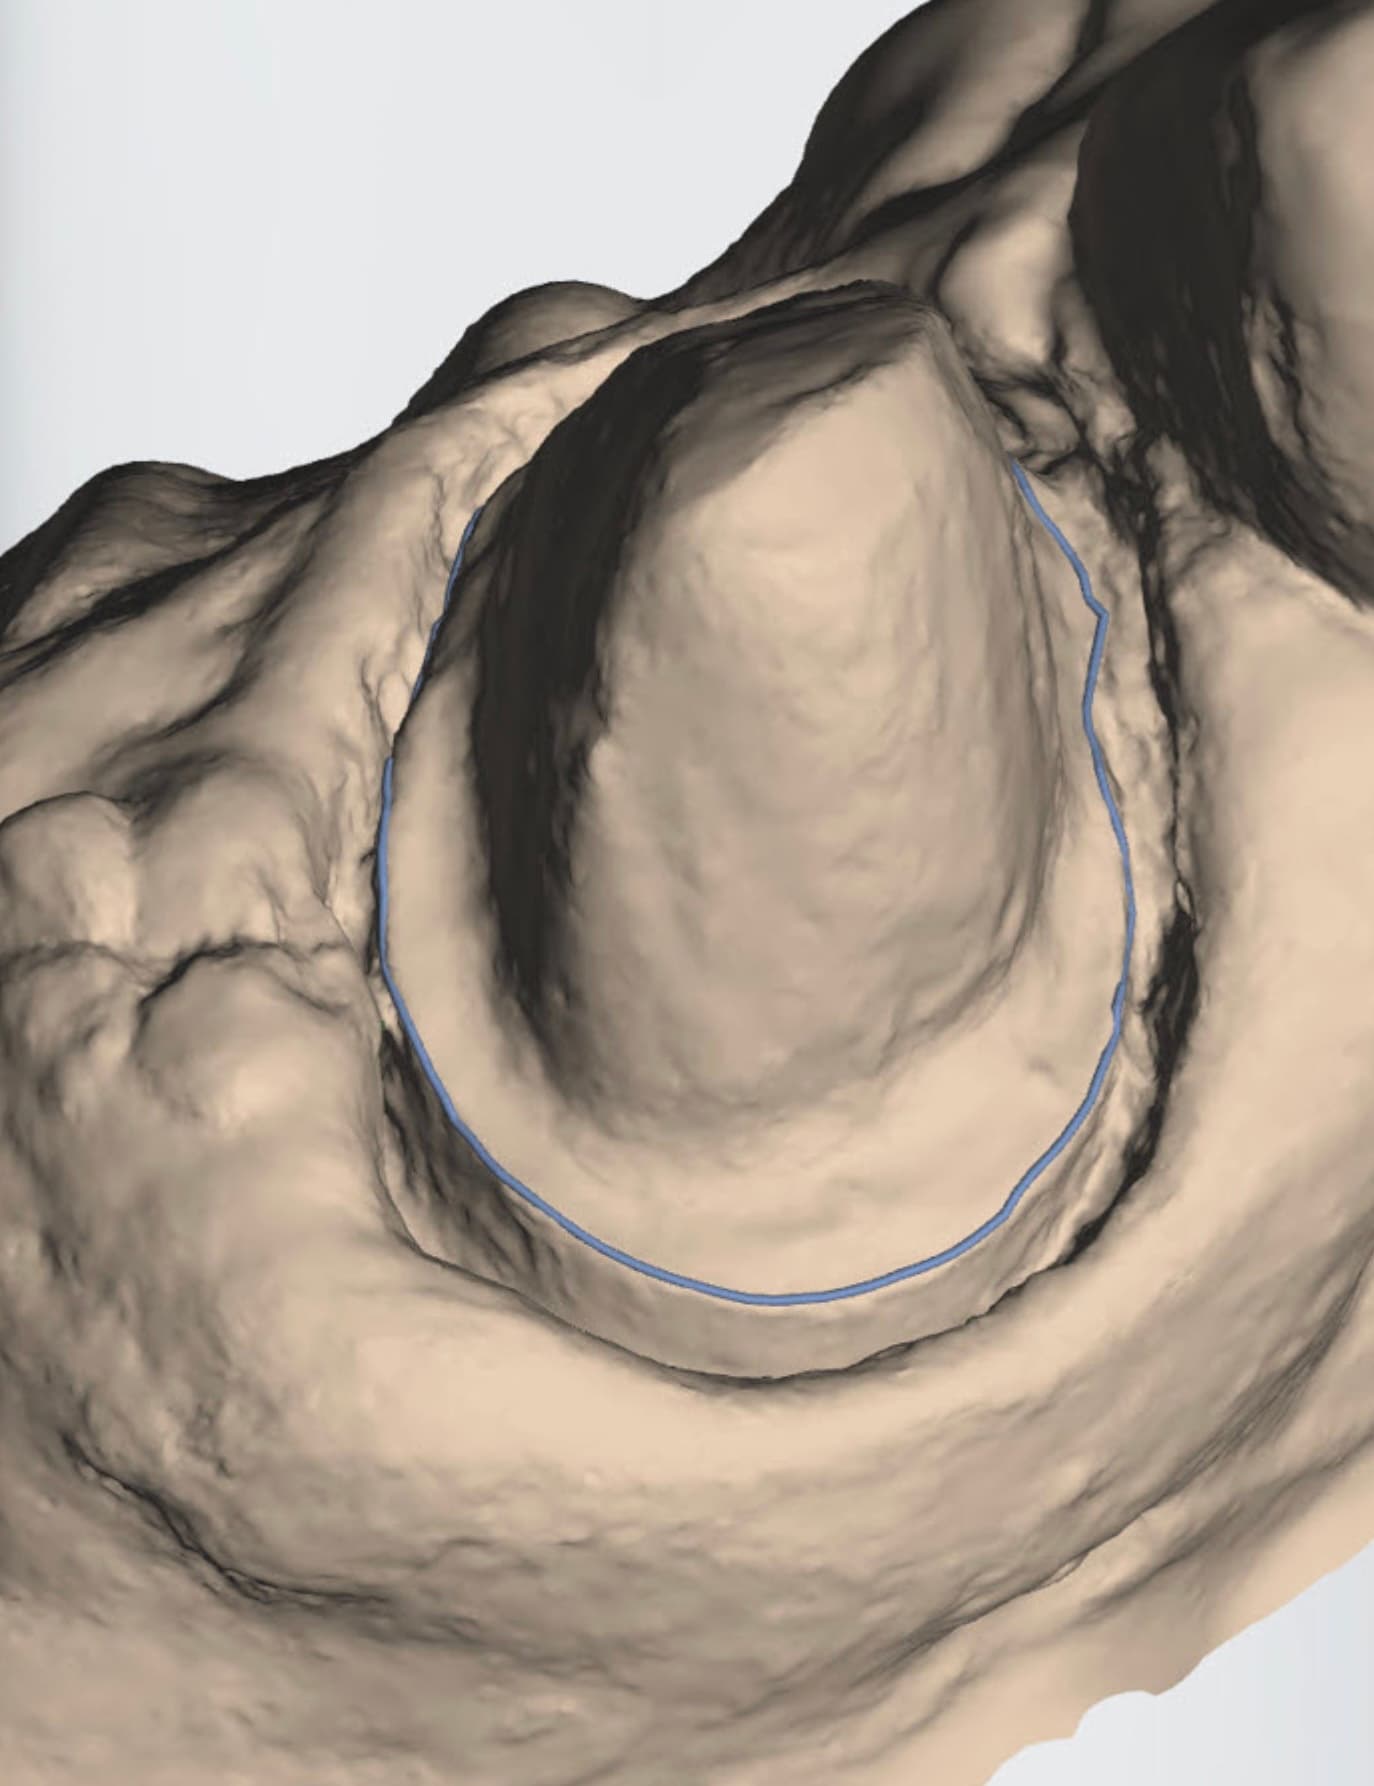
A clean intra-oral scan with a crisp, fully visible margin
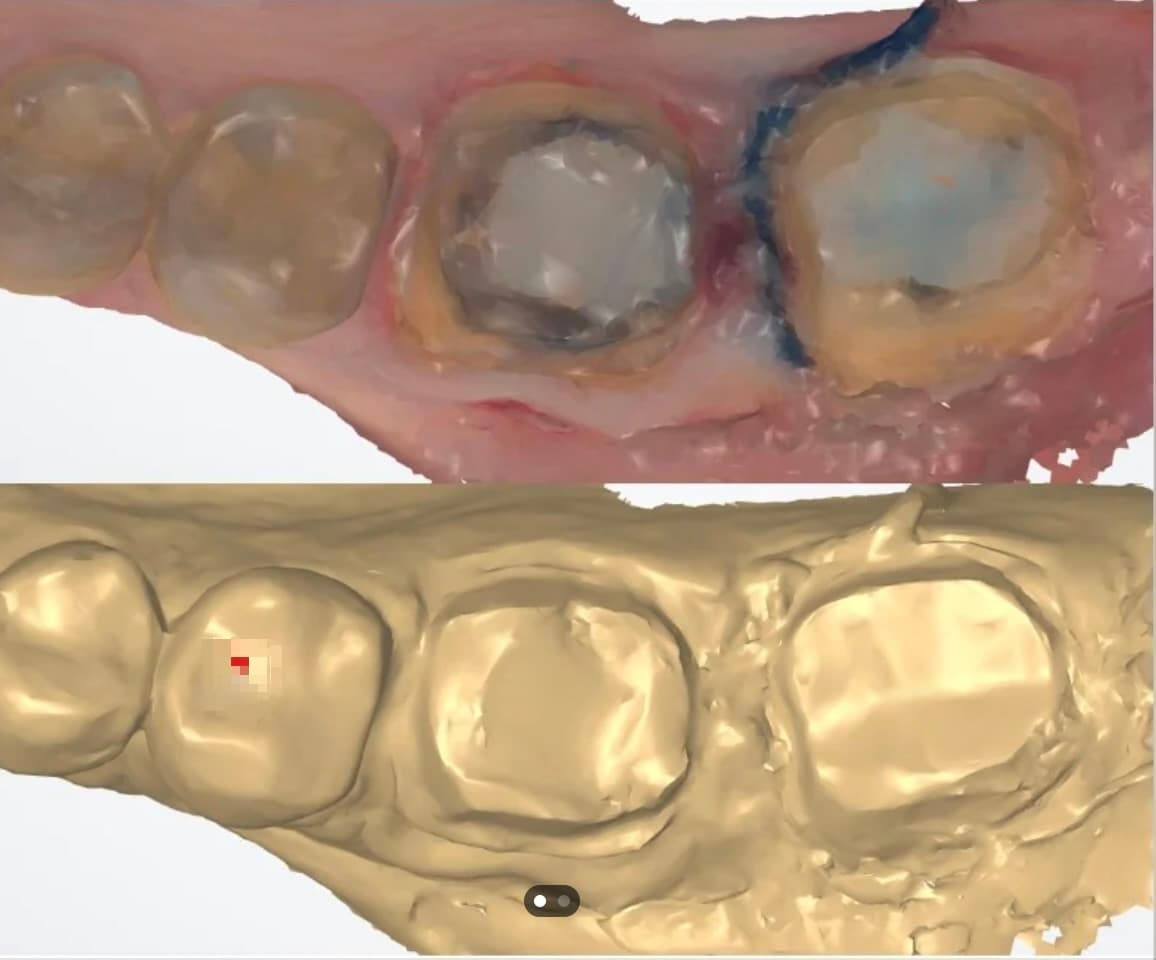
Colour scan vs Greyscale (Lab view) — notice the loss of margin contrast. A coloured scan fools the eyes into seeing the margin.
Match the Prep to the Material
A quick bench guide to typical minimum reduction. Always check the maker's guidance for the exact material.
| Material | Occlusal / Incisal | Axial | Margin | Avoid |
|---|---|---|---|---|
| Translucent Zirconias (such as Fusion Zirconia), monolithic | 1.0 mm | 0.8 mm | Light chamfer | Sharp internal angles |
| Zirconia, layered or cut-back | 1.5–2.0 mm | 1.2–1.5 mm | Chamfer or rounded shoulder | Under-reduction on the labial face |
| E.max / Lithium Disilicate crown | 1.5 mm | 1.0–1.2 mm | Deep chamfer or rounded shoulder | Feather-edge margins |
| E.max / Lithium Disilicate veneer | 0.5–1.0 mm | 0.3–0.6 mm | Light chamfer, ideally in enamel | Sharp incisal line angles |
| Feldspathic Porcelain veneer | 0.5–1.0 mm | 0.3–0.5 mm | Kept within enamel | Exposing large areas of dentine |
| Porcelain Fused to Metal | 1.5–2.0 mm | 1.2–1.5 mm labial | Shoulder labially, chamfer elsewhere | Thin labial reduction |
- Bridges: Zirconia connectors need roughly 9 mm² anteriorly and 12 mm² posteriorly. Lithium disilicate needs around 16 mm², and should be kept to short spans no further back than the premolars.
- Dark or discoloured stumps: Allow an extra 0.3–0.5 mm, or ask us about internal opaque masking at the pre-sinter stage (Zirconia only).
In Practice: The Veneer That Wouldn't Sit
Consider a familiar case: a set of E.max veneers on an upper anterior segment. The preps look conservative and neat. But the incisal edges have been left sharp, one margin is feathered, and the reduction has been judged by eye.
At the lab, the software has to over-mill the incisal fitting surface to clear the sharp edge. The feathered margin can only be finished to a knife-thin edge that chips on try-in. The labial reduction is dissimilar, so one veneer is 0.3 mm thick and its neighbour 0.7 mm, and the shade no longer matches across the smile.
None of that is a ceramic problem. All of it could have been avoided with a reduction guide, a rounded incisal edge and a clear chamfer.
Standard Advice: 7 Steps to a Prep That Works
- 1. Choose the material before you pick up the bur, never the other way round.
- 2. Use a reduction guide taken from the diagnostic wax-up. Reduction judged by eye is nearly always too little.
- 3. Round-over every internal line angle, so the mill can reproduce exactly what you prepared.
- 4. Keep a gentle taper of around 6–10°, with at least 4 mm of wall height on molars for retention.
- 5. Give a clear, smooth, continuous margin, and avoid feather edges on glass-ceramics.
- 6. Retract, control bleeding and keep the field dry before you scan or take the impression.
- 7. Send a stump shade photograph with every translucent case (see Issue 6), so we know what we are covering.
Talk to Us Before the Bur Touches the Tooth
A good preparation is a conversation between the surgery and the laboratory, and the best time to have it is before the first cut. If a case is tight on space, the stump is dark, or you're unsure which material suits the room you have, call us first. A five-minute conversation at the planning stage can save a remake, a second appointment and a disappointed patient.
We'd rather answer the question than repair the result.
The Ambridge Standard is published in the belief that a well-informed dentist and a well-informed technician produce, without exception, the better restoration.
If you'd like a reduction guide made for a case, or would like to talk through preparation for a particular material, get in touch with Ambridge Ceramics on 01765 607347 or info@ambridgeceramics.com.
Until next issue.
Ambridge Ceramics Ltd, Ripon, North Yorkshire
Talk a Case Through With Us
Have a case where the material choice is in question? Get in touch before work begins , we are always happy to discuss indications, options and anticipated outcomes.
Send a case →Ambridge Ceramics
A multi‑award‑winning UK dental laboratory based in Ripon, North Yorkshire.
Premier House, Kiln Court, College Rd, Ripon HG4 2BP, United Kingdom
- Digital accuracy supported by human expertise.
- Technician‑led decision‑making at every stage.
- Materials chosen for longevity, not convenience.
- Aesthetic outcomes guided by real‑world function.
- The Foundation of Excellence
- Material Intelligence
- Digital Precision
- Hand-Finished Excellence
- Graduated Density
- Shade Matching & Characterisation
- Screw‑mentable Implant Restorations
- The Collective Bench
- Ambridge and the Esthetic Zone
- A Bond That Lasts: The Overlooked Science of Cementation
- The Blueprint Beneath: Why the Preparation Decides the Restoration(we are here)